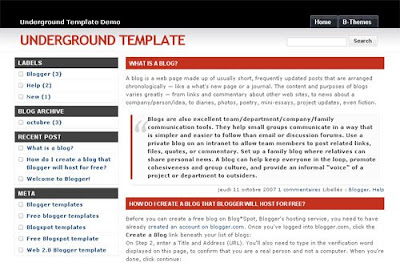
Template name : Underground Blogger Template
Type : New Blogger Template (XML),Top Navigation Bar,Search Box,2 Column, 1 Sidebar, Left Sidebar
Demo|Download
Home » Archives for August 2009

<data:post.body/><!--Related Post javascripts start from here-->
<b:if cond='data:blog.pageType == "item"'>
<div class='similiar'>
<div class='widget-content'>
<h3>Related Posts :</h3>
<div id='data2007'/><br/><br/>
<script type='text/javascript'>
var homeUrl3 = "<data:blog.homepageUrl/>";
var maxNumberOfPostsPerLabel = 4;
var maxNumberOfLabels = 10;
maxNumberOfPostsPerLabel = 100;
maxNumberOfLabels = 3;
function listEntries10(json) {
var ul = document.createElement('ul');
var maxPosts = (json.feed.entry.length <= maxNumberOfPostsPerLabel) ?
json.feed.entry.length : maxNumberOfPostsPerLabel;
for (var i = 0; i < maxPosts; i++) {
var entry = json.feed.entry[i];
var alturl;
for (var k = 0; k < entry.link.length; k++) {
if (entry.link[k].rel == 'alternate') {
alturl = entry.link[k].href;
break;
}
}
var li = document.createElement('li');
var a = document.createElement('a');
a.href = alturl;
if(a.href!=location.href) {
var txt = document.createTextNode(entry.title.$t);
a.appendChild(txt);
li.appendChild(a);
ul.appendChild(li);
}
}
for (var l = 0; l < json.feed.link.length; l++) {
if (json.feed.link[l].rel == 'alternate') {
var raw = json.feed.link[l].href;
var label = raw.substr(homeUrl3.length+13);
var k;
for (k=0; k<20; k++) label = label.replace("%20", " ");
var txt = document.createTextNode(label);
var h = document.createElement('b');
h.appendChild(txt);
var div1 = document.createElement('div');
div1.appendChild(h);
div1.appendChild(ul);
document.getElementById('data2007').appendChild(div1);
}
}
}
function search10(query, label) {
var script = document.createElement('script');
script.setAttribute('src', query + 'feeds/posts/default/-/'
+ label +
'?alt=json-in-script&callback=listEntries10');
script.setAttribute('type', 'text/javascript');
document.documentElement.firstChild.appendChild(script);
}
var labelArray = new Array();
var numLabel = 0;
<b:loop values='data:posts' var='post'>
<b:loop values='data:post.labels' var='label'>
textLabel = "<data:label.name/>";
var test = 0;
for (var i = 0; i < labelArray.length; i++)
if (labelArray[i] == textLabel) test = 1;
if (test == 0) {
labelArray.push(textLabel);
var maxLabels = (labelArray.length <= maxNumberOfLabels) ?
labelArray.length : maxNumberOfLabels;
if (numLabel < maxLabels) {
search10(homeUrl3, textLabel);
numLabel++;
}
}
</b:loop>
</b:loop>
</script>
</div>
</div>
</b:if>
<!--Related Post javascripts End here-->

<a href="http://twitter.com/home?status=Currently reading <?php the_permalink(); ?>" title="Click to send this page to Twitter!" target="_blank">Share on Twitter</a>


/* slideshow */
.sample{padding:20px 10px; margin:4px 0 25px 0; border:1px solid #e1e1e1}
#box2{
position:absolute;
}
#box2 span{
display:block;
float:left;
}
.buttons{text-align:center;padding:5px;}
.buttons span{color:#0080FF;padding:0 5px;cursor:pointer;font:10px Verdana}
.buttons span.active, .buttons span:hover{background:#0080FF;color:#fff}

.mask2{
position:relative;
width:240px;
height:180px;
overflow:hidden;
}
<!-- mootools -->
<script src='http://ajax.googleapis.com/ajax/libs/mootools/1.2.3/mootools.js' type='text/javascript'/>
<!-- Slideshow -->
<script type='text/javascript'>
//<![CDATA[
var noobSlide=new Class({initialize:function(a){this.items=a.items;this.mode=a.mode||'horizontal';this.modes={horizontal:['left','width'],vertical:['top','height']};this.size=a.size||240;this.box=a.box.setStyle(this.modes[this.mode][1],(this.size*this.items.length)+'px');this.button_event=a.button_event||'click';this.handle_event=a.handle_event||'click';this.onWalk=a.onWalk||null;this.currentIndex=null;this.previousIndex=null;this.nextIndex=null;this.interval=a.interval||5000;this.autoPlay=a.autoPlay||false;this._play=null;this.handles=a.handles||null;if(this.handles){this.addHandleButtons(this.handles)}this.buttons={previous:[],next:[],play:[],playback:[],stop:[]};if(a.addButtons){for(var b in a.addButtons){this.addActionButtons(b,$type(a.addButtons[b])=='array'?a.addButtons[b]:[a.addButtons[b]])}}this.fx=new Fx.Tween(this.box,$extend((a.fxOptions||{duration:500,wait:false}),{property:this.modes[this.mode][0]}));this.walk((a.startItem||0),true,true)},addHandleButtons:function(a){for(var i=0;i<a.length;i++){a[i].addEvent(this.handle_event,this.walk.bind(this,[i,true]))}},addActionButtons:function(a,b){for(var i=0;i<b.length;i++){switch(a){case'previous':b[i].addEvent(this.button_event,this.previous.bind(this,[true]));break;case'next':b[i].addEvent(this.button_event,this.next.bind(this,[true]));break;case'play':b[i].addEvent(this.button_event,this.play.bind(this,[this.interval,'next',false]));break;case'playback':b[i].addEvent(this.button_event,this.play.bind(this,[this.interval,'previous',false]));break;case'stop':b[i].addEvent(this.button_event,this.stop.bind(this));break}this.buttons[a].push(b[i])}},previous:function(a){this.walk((this.currentIndex>0?this.currentIndex-1:this.items.length-1),a)},next:function(a){this.walk((this.currentIndex<this.items.length-1?this.currentIndex+1:0),a)},play:function(a,b,c){this.stop();if(!c){this[b](false)}this._play=this[b].periodical(a,this,[false])},stop:function(){$clear(this._play)},walk:function(a,b,c){if(a!=this.currentIndex){this.currentIndex=a;this.previousIndex=this.currentIndex+(this.currentIndex>0?-1:this.items.length-1);this.nextIndex=this.currentIndex+(this.currentIndex<this.items.length-1?1:1-this.items.length);if(b){this.stop()}if(c){this.fx.cancel().set((this.size*-this.currentIndex)+'px')}else{this.fx.start(this.size*-this.currentIndex)}if(b&&this.autoPlay){this.play(this.interval,'next',true)}if(this.onWalk){this.onWalk((this.items[this.currentIndex]||null),(this.handles&&this.handles[this.currentIndex]?this.handles[this.currentIndex]:null))}}}});
//]]>
</script>
<script type='text/javascript'>
window.addEvent('domready',function(){
//SAMPLE 2 (transition: Bounce.easeOut)
var nS2 = new noobSlide({
box: $('box2'),
items: [0,1,2,3,4,5,6.7],
interval: 3000,
fxOptions: {
duration: 1000,
transition: Fx.Transitions.Bounce.easeOut,
wait: false
},
addButtons: {
previous: $('prev1'),
next: $('next1')
}
});
});
</script>
<h2>SlideShow</h2>
<div class="sample">
<div class="mask2">
<div id="box2">
<span><img alt="Photo" src="YOUR-IMAGE-ADDRESS"/></span>
<span><img alt="Photo" src="YOUR-IMAGE-ADDRESS"/></span>
<span><img alt="Photo" src="YOUR-IMAGE-ADDRESS"/></span>
<span><img alt="Photo" src="YOUR-IMAGE-ADDRESS"/></span>
<span><img alt="Photo" src="YOUR-IMAGE-ADDRESS"/></span>
<span><img alt="Photo" src="YOUR-IMAGE-ADDRESS"/></span>
<span><img alt="Photo" src="YOUR-IMAGE-ADDRESS"/></span>
<span><img alt="Photo" src="YOUR-IMAGE-ADDRESS"/></span>
</div>
</div>
<p class="buttons">
<span id="prev1"><< Previous</span>
<span id="next1">Next >></span>
</p>
</div>

#pageflip {
position: relative;
}
#pageflip img {
width: 50px; height: 52px;
z-index: 99;
position: absolute;
right: 0; top: 0;
-ms-interpolation-mode: bicubic;
}
#pageflip .msg_block {
width: 50px; height: 50px;
position: absolute;
z-index: 50;
right: 0; top: 0;
background: url(https://blogger.googleusercontent.com/img/b/R29vZ2xl/AVvXsEg2nYUXZbMatVlDFVEN-oCEFWNVL8gKMuGF8YLgPwisZhVKIyFtxxqYpiN6XqGya9CmU546JqThqt3v-READzZUMOM_kPk8_NUQqR20YqFfSRA_7ntYPgFbg9Vsh8ZUbJrTdvNNafoLxURe/) no-repeat right top;
text-indent: -9999px;
}<script src='http://code.jquery.com/jquery-latest.js' type='text/javascript'/>
<script type='text/javascript'>
$(document).ready(function(){
//Page Flip on hover
$("#pageflip").hover(function() {
$("#pageflip img , .msg_block").stop()
.animate({
width: '307px',
height: '319px'
}, 500);
} , function() {
$("#pageflip img").stop()
.animate({
width: '50px',
height: '52px'
}, 220);
$(".msg_block").stop()
.animate({
width: '50px',
height: '50px'
}, 200);
});
});
</script>
<div id='pageflip'>
<a href='http://feeds2.feedburner.com/blogspot/WyNa'>
 <img alt='' src='https://blogger.googleusercontent.com/img/b/R29vZ2xl/AVvXsEjBxjNruxpdFsi9Y5RtkWUQg4pXdzWFh4DRey-NsWNU7QUlIalXduKDCExjmXulq3BnZhtfxzwuixtGzoXGoPGal_hifHRq7rk3tzi5ScrcAw3mhHfyKCyFO5LVV-s-itcod7idEu5lMgKQ/'/>
 <span class='msg_block'>Subscribe via RSS</span>
</a>
</div>


ul.thumb {
float: left;
list-style: none;
margin: 0; padding: 10px;
width: 360px;
}
ul.thumb li {
margin: 0; padding: 5px;
float: left;
position: relative;  /* Set the absolute positioning base coordinate */
width: 110px;
height: 110px;
}
ul.thumb li img {
width: 100px; height: 100px; /* Set the small thumbnail size */
-ms-interpolation-mode: bicubic; /* IE Fix for Bicubic Scaling */
border: 1px solid #ddd;
padding: 5px;
background: #f0f0f0;
position: absolute;
left: 0; top: 0;
}
ul.thumb li img.hover {
background:url(https://blogger.googleusercontent.com/img/b/R29vZ2xl/AVvXsEiyqCASiLbf2rQoMAgXs1xEBsYiBJG737S8kiaalf4D3gzVa-EXCnVD8YurlHG6sh3rZ8WybjBASC2c52U6_JYgyiGHFAkmP0S2asxlq72KPcVPxLPhkJGLd3GbJiMsED72Gm0aIWGnaaad/) no-repeat center center;  /* Image used as background on hover effect
border: none; /* Get rid of border on hover */
}<script src='http://code.jquery.com/jquery-latest.js' type='text/javascript'/>
<script type='text/javascript'>
$(document).ready(function(){
//Larger thumbnail preview
$("ul.thumb li").hover(function() {
$(this).css({'z-index' : '10'});
$(this).find('img').addClass("hover").stop()
.animate({
marginTop: '-110px',
marginLeft: '-110px',
top: '50%',
left: '50%',
width: '174px',
height: '174px',
padding: '20px'
}, 200);
} , function() {
$(this).css({'z-index' : '0'});
$(this).find('img').removeClass("hover").stop()
.animate({
marginTop: '0',
marginLeft: '0',
top: '0',
left: '0',
width: '100px',
height: '100px',
padding: '5px'
}, 400);
});
//Swap Image on Click
$("ul.thumb li a").click(function() {
var mainImage = $(this).attr("href"); //Find Image Name
$("#main_view img").attr({ src: mainImage });
return false;
});
});
</script>
<ul class="thumb">
<li><a href="#"><img src="picture1 Link" alt="" /></a></li>
<li><a href="#"><img src="picture2 Link" alt="" /></a></li>
<li><a href="#"><img src="picture3 Link" alt="" /></a></li>
<li><a href="#"><img src="picture4 Link" alt="" /></a></li>
<li><a href="#"><img src="picture5 Link" alt="" /></a></li>
</ul>
#easyTooltip{
padding:5px 10px;
border:1px solid #EF6D21;
background: #181C18;
color:#E0EFE0;
}<!-- jQuery -->
<script src='http://ajax.googleapis.com/ajax/libs/jquery/1.3.2/jquery.min.js' type='text/javascript'/>
<!-- begin Tooltips -->
<script type='text/javascript'>
$(document).ready(function(){
$("a.tooltip").easyTooltip();
});
</script>
<script type='text/javascript'>
//<![CDATA[
(function($){$.fn.easyTooltip=function(options){var defaults={xOffset:20,yOffset:30,tooltipId:"easyTooltip",clickRemove:false,content:"",useElement:""};var options=$.extend(defaults,options);var content;this.each(function(){var title=$(this).attr("title");$(this).hover(function(e){content=(options.content!="")?options.content:title;content=(options.useElement!="")?$("#"+options.useElement).html():content;$(this).attr("title","");if(content!=""&&content!=undefined){$("body").append("<div id='"+options.tooltipId+"'>"+content+"</div>");$("#"+options.tooltipId).css("position","absolute").css("top",(e.pageY-options.yOffset)+"px").css("left",(e.pageX+options.xOffset)+"px").css("display","none").fadeIn("fast")}},function(){$("#"+options.tooltipId).remove();$(this).attr("title",title)});$(this).mousemove(function(e){$("#"+options.tooltipId).css("top",(e.pageY-options.yOffset)+"px").css("left",(e.pageX+options.xOffset)+"px")});if(options.clickRemove){$(this).mousedown(function(e){$("#"+options.tooltipId).remove();$(this).attr("title",title)})}})}})(jQuery);
//]]>
</script>
<!-- end tooltips -->
<a class='tooltip' title='Your Link Title' href="Your URL">Link Name</a><a class='tooltip' title='Latest blogger tips' href="http://bloggertipandtrick.blogspot.com/">Blogger Tips</a>
/* pageTabs
*/
.pageTabs {width: 760px; height:150px; margin: 10px auto 0;  font-size:11px;}
ul.tabs {
margin: 0;
padding: 0;
float: left;
list-style: none;
height: 32px;
border-bottom: 1px solid #999;
border-left: 1px solid #999;
width: 100%;
}
ul.tabs li {
float: left;
margin: 0;
padding: 0;
height: 31px;
line-height: 31px;
border: 1px solid #999;
border-left: none;
margin-bottom: -1px;
background: #e0e0e0;
overflow: hidden;
position: relative;
}
ul.tabs li a {
text-decoration: none;
color: #000;
display: block;
font-size: 1.2em;
padding: 0 20px;
border: 1px solid #fff;
outline: none;
}
ul.tabs li a:hover {
background: #ccc;
}
html ul.tabs li.active, html ul.tabs li.active a:hover  {
background: #fff;
border-bottom: 1px solid #fff;
}
.tab_container {
border: 1px solid #999;
border-top: none;
clear: both;
float: left;
width: 100%;
background: #fff;
-moz-border-radius-bottomright: 5px;
-khtml-border-radius-bottomright: 5px;
-webkit-border-bottom-right-radius: 5px;
-moz-border-radius-bottomleft: 5px;
-khtml-border-radius-bottomleft: 5px;
-webkit-border-bottom-left-radius: 5px;
}
.tab_content {
padding: 20px;
font-size: 1.2em;
}
.tab_content h2 {
font-weight: normal;
padding-bottom: 5px;
border-bottom: 1px dashed #ddd;
font-size: 1.8em;
}
.tab_content h3 a{
line-height: 2em;
color: #254588;
}
.tab_content img {
float: left;
margin: 10px 20px 20px 0;
border: 1px solid #ddd;
padding: 5px;
}
.tab_content p{
padding-bottom:10px;
}
/*
<script src='http://ajax.googleapis.com/ajax/libs/jquery/1.3.2/jquery.min.js' type='text/javascript'/>
<script type='text/javascript'>
$(document).ready(function(){$(".tab_content").hide();$("ul.tabs li:first").addClass("active").show();$(".tab_content:first").show();$("ul.tabs li").click(function(){$("ul.tabs li").removeClass("active");$(this).addClass("active");$(".tab_content").hide();var activeTab=$(this).find("a").attr("href");$(activeTab).fadeIn(1000)})});
</script>
<ul class="tabs">
<li><a href="#tab1">TAB1</a></li>
<li><a href="#tab2">TAB2</a></li>
<li><a href="#tab3">TAB3</a></li>
<li><a href="#tab4">TAB4</a></li>
<li><a href="#tab5">TAB5</a></li>
</ul>

<div class="tab_container">
<div id="tab1" class="tab_content">
ENTER TAB 1 CONTENT
</div>

<div id="tab2" class="tab_content">
ENTER TAB 2 CONTENT
</div>

<div id="tab3" class="tab_content">
ENTER TAB 3 CONTENT
</div>

<div id="tab4" class="tab_content">
ENTER TAB 4 CONTENT
</div>

<div id="tab5" class="tab_content">
ENTER TAB 5 CONTENT
</div>

</div>

<p><data:post.body/></p>
<a expr:href='"http://www.facebook.com/sharer.php?&u=" + data:post.url' target='_blank'>Share on Facebook</a>
<p><data:post.body/></p>
<a expr:href='"http://twitthis.com/twit?url=" + data:post.url' rel='external nofollow' target='_blank'>Twit this</a>
<p><data:post.body/></p>
<a expr:href='"http://del.icio.us/post?v=4&url=" + data:post.url + "&title=" + data:post.title' rel='nofollow' target='_blank'>Share on Delicious</a>
<p><data:post.body/></p>
<a expr:href='"http://technorati.com/signup/?f=favorites&Url=" + data:post.url' rel='nofollow' target='_blank'>Share on Technorati</a>
<p><data:post.body/></p>
<a expr:href='"http://digg.com/submit?phase=2&url=" + data:post.url + "&title=" + data:post.title' rel='nofollow' target='_blank'>Digg it !!!</a>
<p><data:post.body/></p>
<a expr:href='"http://www.stumbleupon.com/submit?&url=" + data:post.url + "&title=" + data:post.title' rel='nofollow' target='_blank'>Stumble it !!!</a>
<p><data:post.body/></p>
<a expr:href='"http://reddit.com/submit?&url=" + data:post.url + "&title=" + data:post.title' rel='nofollow' target='_blank'>Share on Reddit!!!</a>
/*
Slideshow style rules.
*/
#contentSlide {
border: 1px solid #000;
background:#212421;
height:263px;
padding:10px 0;
}
#slideshow {
margin:0 auto;
width:640px;
height:263px;
background:transparent url(http://lh6.ggpht.com/_dfnTVAxeWMI/SlTPJpS_axI/AAAAAAAABYA/JS60KVWJ9GQ/bg_slideshow.jpg) no-repeat 0 0;
position:relative;
}
#slideshow #slidesContainer {
margin:0 auto;
width:560px;
height:263px;
overflow:auto; /* allow scrollbar */
position:relative;
}
#slideshow #slidesContainer .slide {
margin:0 auto;
width:540px; /* reduce by 20 pixels of #slidesContainer to avoid horizontal scroll */
height:263px;
}
.control {
display:block;
width:39px;
height:263px;
text-indent:-10000px;
position:absolute;
cursor: pointer;
}
#leftControl {
top:0;
left:0;
background:transparent url(http://lh6.ggpht.com/_dfnTVAxeWMI/SlT8KH99FgI/AAAAAAAABZM/e9gXvHjzltU/control_left.jpg) no-repeat 0 0;
}
#rightControl {
top:0;
right:0;
background:transparent url(http://lh6.ggpht.com/_dfnTVAxeWMI/SlT8KMpFpxI/AAAAAAAABZQ/a207Rx0XuiU/control_right.jpg) no-repeat 0 0;
}

.slide h2, .slide p {
margin:15px;
}
.slide h2 {
font:italic 24px Georgia, "Times New Roman", Times, serif;
color:#212421;
letter-spacing:-1px;
}
.slide img {
float:right;
margin:0 15px;
padding: 1px;
background-color: #212421;
border: 1px solid #999;
}
<script src='http://ajax.googleapis.com/ajax/libs/jquery/1.3.2/jquery.min.js' type='text/javascript'/>

<script type='text/javascript'>
//<![CDATA[
$(document).ready(function(){var currentPosition=0;var slideWidth=560;var slides=$('.slide');var numberOfSlides=slides.length;$('#slidesContainer').css('overflow','hidden');slides.wrapAll('<div id="slideInner"></div>').css({'float':'left','width':slideWidth});$('#slideInner').css('width',slideWidth*numberOfSlides);$('#slideshow').prepend('<span class="control" id="leftControl">Clicking moves left</span>').append('<span class="control" id="rightControl">Clicking moves right</span>');manageControls(currentPosition);$('.control').bind('click',function(){currentPosition=($(this).attr('id')=='rightControl')?currentPosition+1:currentPosition-1;manageControls(currentPosition);$('#slideInner').animate({'marginLeft':slideWidth*(-currentPosition)})});function manageControls(position){if(position==0){$('#leftControl').hide()}else{$('#leftControl').show()}if(position==numberOfSlides-1){$('#rightControl').hide()}else{$('#rightControl').show()}}
});
//]]>
</script>
<!-- Slideshow HTML -->
<div id="contentSlide"><div id="slideshow">
<div id="slidesContainer">

<div class="slide">
<h2>Free Domain Name</h2>
<p><a href="http://tinyurl.com/nlqnby"><img alt="Free Domain Name" width="215" src="https://blogger.googleusercontent.com/img/b/R29vZ2xl/AVvXsEij36at09TrSNWo7iunCz2LfaygBQ8BwvQluLmI-d4oX05CYD3l3XE-tAKhCSVgTcDO0hgC0QBpLa-FW8krEQ9x9lqpzUIO7goNvG7PRNkuaiWxpG2gxIFthhEPcfIKrnJRyFZ1AFrjlnc/" height="145"/></a>CO.CC has become the world's #1 choice for free domains by providing innovative, competitively-priced products, delivering the highest quality customer service, and by always appreciating and listening to its customers!</p>
</div>

<div class="slide">
<h2>Free Web Hosting</h2>
<p><a href="http://www.000webhost.com/173265.html"><img alt="Free Web Hosting" width="215" src="http://www.000webhost.com/images/banners/120x120/banner1.gif" height="145"/></a>000webhost.com ($0.00 webhost), is an industry leader in providing top class free web hosting services without advertising! There are no hidden costs, no adverts, and no restrictive terms. Lighting fast speeds, maximum reliability and fanatical user support are just a few of the features you'll receive with our service.</p>
</div>

<div class="slide">
<h2>Make Money on Twitter</h2>
<p><a href="http://revtwt.com/index.php?id=18676"><img alt="Make Money on Twitter" width="215" src="http://revtwt.com/images/TwtAd_referral02.jpg" height="145"/></a>You enjoy tweeting with your friends, but wouldn't it be great to make a little extra cash on the side while you post on Twitter? RevTwt has the solution: we give you links to post on your Twitter account, and you earn money each time someone clicks on your link!</p>
</div>

<div class="slide">
<h2>Monitize Your Blog</h2>
<p><a href="http://www.bidvertiser.com/bdv/bidvertiser/bdv_ref.dbm?Ref_Option=pub&Ref_PID=232687"><img alt="Monitize Your Blog" width="215" src="http://www.bidvertiser.com/BidVertiser/images/Referral/p/ref_125x125_yellow_pbl.gif" height="145"/></a>
Pay per click advertising - online advertising directly on sites of your choice, internet marketing solution for online advertisers.</p>
</div>

<div class="slide">
<h2>Upload And Earn</h2>
<p><a href="http://www.ziddu.com/register.php?referralid=%28y%5DtNG;Z%7EQ%7C"><img alt="Upload And Earn" width="215" src="https://blogger.googleusercontent.com/img/b/R29vZ2xl/AVvXsEjM-uqRHsNE3_1Zkt82xkbxwx6lApMIFkeT_Urmn1mNs7WJbAthCSV37ce1efYWDWgdUAuM6RXOFwv-RUvizyWVzbWRGShMdPQV3CdTmAEFvXebhiBeYPtforDCB5i_XqyTo-cRl6iWpe0/" height="145"/></a>Ziddu is a complete Free file hosting system which offers services like Free Web Hosting, Image hosting & Free Web Space. Ziddu users can play,watch,share ...
</p>
</div>

</div>
</div></div>
<!-- Slideshow HTML -->

/* resizeFont
*/
#resizeFont{
text-align:right;
margin-right:10px;
}
<script src='http://ajax.googleapis.com/ajax/libs/jquery/1.3.2/jquery.min.js' type='text/javascript'/>
<!-- begin ResizeFont -->
<script type='text/javascript'>
$(function(){
$('input').click(function(){
var ourText = $('#content-wrapper');
var currFontSize = ourText.css('fontSize');
var finalNum = parseFloat(currFontSize, 10);
var stringEnding = currFontSize.slice(-2);
if(this.id == 'large') {
finalNum *= 1.1;
}
else if (this.id == 'small'){
finalNum /=1.1;
}
else if (this.id == 'reset'){
finalNum =13;
}
ourText.animate({fontSize: finalNum + stringEnding},500);
});
});
</script>
<div id='resizeFont'>
<input id='large' type='button' value='A+'/>
<input id='reset' type='button' value='A'/>
<input id='small' type='button' value='A-'/>
</div>

/* s3Slider jQuery plugin */
#s3slider {
border:5px solid #000;
width:250px; /* important to be same as image width */
height:190px; /* important to be same as image height */
position: relative; /* important */
overflow: hidden; /* important */
}

#s3sliderContent {
margin: 0px; padding:0px;
width:250px; /* important to be same as image width or wider */
position: absolute; /* important */
top: 0; /* important */
margin-left: 0; /* important */
}

.s3sliderImage {
float: left; /* important */
position: relative; /* important */
display: none; /* important */
}

.s3sliderImage span {
position: absolute; /* important */
left: 0;
text-indent: 0px; /* reset blogger */
font: 10px Arial, Helvetica, sans-serif;
padding: 10px 13px;
margin: 0;
width:225px; /* need edit to be same as image width or wider */
background-color: #000;
filter: alpha(opacity=70); /* here you can set the opacity of box with text */
-moz-opacity: 0.7; /* here you can set the opacity of box with text */
-khtml-opacity: 0.7; /* here you can set the opacity of box with text */
opacity: 0.7; /* here you can set the opacity of box with text */
color: #fff;
display: block; /* important */
top: 0;

/*
if you put
top: 0; -> the box with text will be shown at the top of the image
if you put
bottom: 0; -> the box with text will be shown at the bottom of the image
*/
}

.clear {
clear: both;
}
<script src='http://ajax.googleapis.com/ajax/libs/jquery/1.3.2/jquery.min.js' type='text/javascript'/>
<!-- begin s3Slider jQuery plugin -->
<script src='http://choenblogspot.googlecode.com/files/s3Slider.js' type='text/javascript'/>
<script type='text/javascript'>
$(document).ready(function() {
$('#s3slider').s3Slider({
timeOut: 4000
});
});
</script>
<div id="s3slider">
<ul id="s3sliderContent">
<li class="s3sliderImage">
<a href="http://www.000webhost.com/173265.html" target="_blank" rel="nofollow"><img border="0" alt="Free Website Hosting" width="250" src="http://www.000webhost.com/images/banners/120x120/banner1.gif" height="190"/></a>
<span>Free Website Hosting</span>
</li>
<li class="s3sliderImage">
<a href="http://tinyurl.com/nlqnby" target="_blank" rel="nofollow"><img border="0" alt="Free Domain name" width="250" src="https://blogger.googleusercontent.com/img/b/R29vZ2xl/AVvXsEij36at09TrSNWo7iunCz2LfaygBQ8BwvQluLmI-d4oX05CYD3l3XE-tAKhCSVgTcDO0hgC0QBpLa-FW8krEQ9x9lqpzUIO7goNvG7PRNkuaiWxpG2gxIFthhEPcfIKrnJRyFZ1AFrjlnc/" height="190"/></a>
<span>Get Free Domain</span>
</li>
<li class="s3sliderImage">
<a href="http://revtwt.com/index.php?id=18676" target="_blank" rel="nofollow"><img width="250" height="190" src="http://revtwt.com/images/TwtAd_referral02.jpg"/></a>
<span>Earn money from twitter</span>
</li>
<div class="clear s3sliderImage"></div>
</ul>
</div>
/* SosialBookmark
*/

#sharebox{
height:48px;
width:400px;
margin:0;
padding:5px 0;
}

ul.sharebox { margin:0px; padding:0px; list-style:none; position:relative; display:block;}
ul.sharebox li { float:left; margin:0 0 0 0px; padding:0px; position:absolute;}
ul.sharebox li a { margin:0 0 0 -24px; display:block;}
ul.sharebox li a:hover { margin:0 0 0 -8px; }
ul.sharebox li img { border:none;}
<script src='http://ajax.googleapis.com/ajax/libs/jquery/1.3.2/jquery.min.js' type='text/javascript'/>
<script type='text/javascript'>
(function($){
$.fn.sharebox = function(){
var element = this;
$(element).find("li").each(function(i){
$(this).css("z-index", 10- i);
if (i>0)
$(this).css("left", i * 24 + 100);
});
}
})(jQuery);
</script>
<script type='text/javascript'>
$(document).ready(function(){
$("#sharebox").sharebox();
});
</script>
<ul class='sharebox' id='sharebox'>
<li><img alt='Share this' src='http://lh6.ggpht.com/_dfnTVAxeWMI/SmkuLMrwEhI/AAAAAAAABm8/SF6x9UfvEJA/s800/sharethis.png'/></li>
<li><a expr:href='" http://digg.com/submit?url=" + data:post.url + "&title=" + data:post.title' target='_blank'><img alt='Sumbit to Digg' src='http://lh5.ggpht.com/_dfnTVAxeWMI/Smktud4qk8I/AAAAAAAABmk/z5vZVjTmD7k/s800/digg_48.png'/></a></li>
<li><a expr:href='" http://www.stumbleupon.com/submit?url=" + data:post.url + "&title=" + data:post.title' target='_blank'><img alt='Sumbit to StumbleUpon' src='http://lh5.ggpht.com/_dfnTVAxeWMI/SmkuLCBTubI/AAAAAAAABm4/KwVHDJnT-EQ/s800/sumbleupon_48.png'/></a></li>
<li><a expr:href='"http://del.icio.us/post?url=" + data:post.url + "&title=" + data:post.title' target='_blank'><img alt='Sumbit to Delicious' src='http://lh6.ggpht.com/_dfnTVAxeWMI/SmktubnHpoI/AAAAAAAABmg/b31Po_kEbnc/s800/delicious_48.png'/></a></li>
<li><a expr:href='" http://technorati.com/faves?add=" + data:post.url + "&title=" + data:post.title' target='_blank'><img alt='Sumbit to Technorati' src='http://lh5.ggpht.com/_dfnTVAxeWMI/SmkuK1y0_cI/AAAAAAAABm0/C8EExNM-xjE/s800/technorati_48.png'/></a></li>
<li><a expr:href='" http://www.reddit.com/submit?url=" + data:post.url + "&title=" + data:post.title' target='_blank'><img alt='Sumbit to Reddit' src='http://lh3.ggpht.com/_dfnTVAxeWMI/Smkturrni-I/AAAAAAAABmw/AbGticB0wAs/s800/reddit_48.png'/></a></li>
</ul>

<script src='http://ajax.googleapis.com/ajax/libs/jquery/1.3.2/jquery.min.js' type='text/javascript'/>
<script src='http://jqueryui.com/latest/ui/ui.core.js' type='text/javascript'/>
<script src='http://jqueryui.com/latest/ui/ui.draggable.js' type='text/javascript'/>
<script type='text/javascript'>
$(document).ready(function(){
$(".draggable").draggable();
});
</script>
<div class='draggable' id='rssicon'>
<a href='http://bloggertipandtrick.blogspot.com/feeds/posts/default'><img alt='rss' src='https://blogger.googleusercontent.com/img/b/R29vZ2xl/AVvXsEiD7GCFBFBGkDZ_8AUtPcmmgnGMW9qzCtz7_N_27lBXDfF3Z4Btu02UycPvoT0lHDYohWdJlJGRYS72UtR_TqnV3-hDGQ8q2HIvmT_g2mqkJ1sBRCs59B3a91dYmDF9zLH8F9cKkhWssw4/'/></a>
</div>
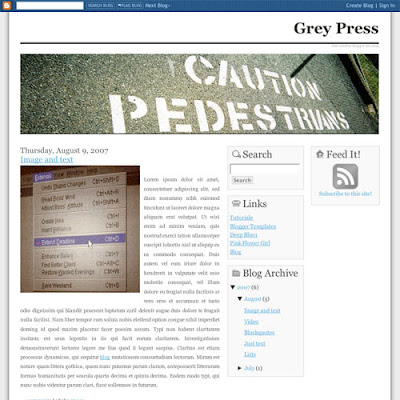
<bgsound src="YOUR-AUDIO-FILE-LINK" loop="-1"/>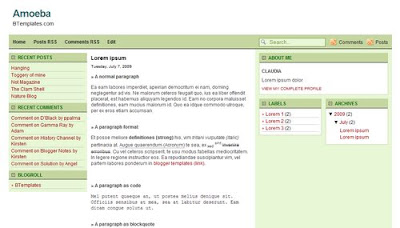
<script language=javascript>
var rev = "fwd";
function titlebar(val)
{
var msg  = "YOUR-TEXT-HERE";
var res = " ";
var speed = 100;
var pos = val;

msg = "   |--- "+msg+" ---|";
var le = msg.length;
if(rev == "fwd"){
 if(pos < le){
 pos = pos+1;
 scroll = msg.substr(0,pos);
 document.title = scroll;
 timer = window.setTimeout("titlebar("+pos+")",speed);
 }
 else{
 rev = "bwd";
 timer = window.setTimeout("titlebar("+pos+")",speed);
 }
}
else{
 if(pos > 0){
 pos = pos-1;
 var ale = le-pos;
 scrol = msg.substr(ale,le);
 document.title = scrol;
 timer = window.setTimeout("titlebar("+pos+")",speed);
 }
 else{
 rev = "fwd";
 timer = window.setTimeout("titlebar("+pos+")",speed);
 }
}
}

titlebar(0);
</script>
<b:if cond='data:blog.pageType != "item"'>

ENTER-YOUR- HTML CODE/TEXT-HERE

</b:if><p class='comment-footer'>
<b:if cond='data:post.embedCommentForm'>
<b:include data='post' name='comment-form'/>
<b:else/>
<b:if cond='data:post.allowComments'>
<h3><a expr:href='data:post.addCommentUrl'
expr:onclick='data:post.addCommentOnclick'>
<data:postCommentMsg/></a></h3>
</b:if>
</b:if>
</p>
</b:if>
<p class='comment-footer'>
<b:if cond='data:post.embedCommentForm'>
<div style='-moz-background-clip: -moz-initial; -moz-background-origin: -moz-initial; -moz-background-inline-policy: -moz-initial; width: 369; text-align: left; border: 1px solid #cccccc; padding: 5px; background: #eeeddf; height:86'>
<b>
<img border='0' height='18' src='http://us.i1.yimg.com/us.yimg.com/i/mesg/emoticons7/21.gif' width='18'/> :))
<img border='0' height='18' src='http://us.i1.yimg.com/us.yimg.com/i/mesg/emoticons7/71.gif' width='18'/> ;))
<img border='0' height='18' src='http://us.i1.yimg.com/us.yimg.com/i/mesg/emoticons7/5.gif' width='18'/> ;;)
<img border='0' height='18' src='http://us.i1.yimg.com/us.yimg.com/i/mesg/emoticons7/4.gif' width='18'/> :D
<img border='0' height='18' src='http://us.i1.yimg.com/us.yimg.com/i/mesg/emoticons7/3.gif' width='18'/> ;)
<img border='0' height='18' src='http://us.i1.yimg.com/us.yimg.com/i/mesg/emoticons7/10.gif' width='18'/> :p
<img border='0' height='18' src='http://us.i1.yimg.com/us.yimg.com/i/mesg/emoticons7/20.gif' width='22'/> :((
<img border='0' height='18' src='http://us.i1.yimg.com/us.yimg.com/i/mesg/emoticons7/1.gif' width='18'/> :)
<img border='0' height='18' src='http://us.i1.yimg.com/us.yimg.com/i/mesg/emoticons7/2.gif' width='18'/> :(
<img border='0' height='18' src='http://us.i1.yimg.com/us.yimg.com/i/mesg/emoticons7/8.gif' width='18'/> :X
<img border='0' height='18' src='http://us.i1.yimg.com/us.yimg.com/i/mesg/emoticons7/12.gif' width='18'/> =((
<img border='0' height='18' src='http://us.i1.yimg.com/us.yimg.com/i/mesg/emoticons7/13.gif' width='18'/> :-o
<img border='0' height='18' src='http://us.i1.yimg.com/us.yimg.com/i/mesg/emoticons7/7.gif' width='20'/> :-/
<img border='0' height='18' src='http://us.i1.yimg.com/us.yimg.com/i/mesg/emoticons7/11.gif' width='18'/> :-*
<img border='0' height='18' src='http://us.i1.yimg.com/us.yimg.com/i/mesg/emoticons7/22.gif' width='18'/> :|
<img border='0' height='18' src='http://us.i1.yimg.com/us.yimg.com/i/mesg/emoticons7/35.gif' width='24'/> 8-}
<img border='0' height='18' src='http://us.i1.yimg.com/us.yimg.com/i/mesg/emoticons7/100.gif' width='31'/> :)]
<img border='0' height='18' src='http://us.i1.yimg.com/us.yimg.com/i/mesg/emoticons7/102.gif' width='44'/> ~x(
<img border='0' height='18' src='http://us.i1.yimg.com/us.yimg.com/i/mesg/emoticons7/104.gif' width='30'/> :-t
<img border='0' height='18' src='http://us.i1.yimg.com/us.yimg.com/i/mesg/emoticons7/66.gif' width='18'/> b-(
<img border='0' height='18' src='http://us.i1.yimg.com/us.yimg.com/i/mesg/emoticons7/62.gif' width='18'/> :-L
<img border='0' height='18' src='http://us.i1.yimg.com/us.yimg.com/i/mesg/emoticons7/14.gif' width='34'/> x(
<img border='0' height='18' src='http://us.i1.yimg.com/us.yimg.com/i/mesg/emoticons7/24.gif' width='30'/> =))
</b>
</div>
<b:include data='post' name='comment-form'/>
<b:else/>
<b:if cond='data:post.allowComments'>
<a expr:href='data:post.addCommentUrl' expr:onclick='data:post.addCommentOnclick'><data:postCommentMsg/></a>
</b:if>
</b:if>
</p>
</b:if>
<script src='smiley.js' type='text/javascript'/><noscript><a href="http://bloggertipandtrick.blogspot.com/" target="_blank">Blogger Tips And Tricks</a></noscript>
<div class='post-header-line-1'/>
<div class='save-delicious'>
<img src='https://blogger.googleusercontent.com/img/b/R29vZ2xl/AVvXsEihgpQZ73-ESBNGQXWiZ-xyBihsGHfMwjcZMFSu42CvItK4JnrviiC4EEaIGB_3qZJKJRKXMMjKg69utV0ryi_yvRaQNDiId05ij_7gFzHC3LC4ngy-C0yo5oHVXiUKLgvYzBgAjkARAws/'/>
<a expr:href='"http://del.icio.us/post?url=" + data:post.url + "&title=" + data:post.title' style='text-transform:none; border:none; text-decoration:underline' target='_blank'> Save to del.icio.us</a> with other <b id='http://bloggertipandtrick.blogspot.com-delicious'>0</b> happy readers
<script type='text/javascript'>
function displayURL(data) {
var urlinfo = data[0];
if (!urlinfo.total_posts) return;
document.getElementById("http://bloggertipandtrick.blogspot.com-delicious").innerHTML = urlinfo.total_posts;
}
</script>
<script src='http://badges.del.icio.us/feeds/json/url/data?url=http://bloggertipandtrick.blogspot.com&callback=displayURL'/>
</div>
.save-delicious{float:right; line-height:25px; border:none; background:url() left no-repeat; padding:0 10px 0 20px; font-size:11px;}

.save-delicious a:link, .save-delicious a:visited{border:none; text-transform:none;}

.save-delicious b{color:#000; font-weight:bold;}
 ad many problems hosting my template images. A year back, I used photobucket to host my template images.. but, the problem with photobucket and many other free image hosts is their bandwidth limitations. Once, you exceed a specific amount of bandwidth, your images won't show, instead.. an irritating ' bandwidth exceeded' image shows. Next, after that I tried to create.. like a new photobucket account per each template.. but, that also exceeded in a matter a couple of weeks.


https://blogger.googleusercontent.com/img/b/R29vZ2xl/AVvXsEjp2I1cOvOezrFEdtqrtcDlXM5Ftblys2QOKgh4uloxkMlP9i9ilPlecUZBbTbSsW6H_e4_VhyphenhyphenisoXXMyV9sQXk_bQ6hckIYN5nL1biJEiKFXFtaZff9q9DG0-XN3PwAr00247CG2xr1I0c/-h/2008-05-28_124414.jpg
https://blogger.googleusercontent.com/img/b/R29vZ2xl/AVvXsEjp2I1cOvOezrFEdtqrtcDlXM5Ftblys2QOKgh4uloxkMlP9i9ilPlecUZBbTbSsW6H_e4_VhyphenhyphenisoXXMyV9sQXk_bQ6hckIYN5nL1biJEiKFXFtaZff9q9DG0-XN3PwAr00247CG2xr1I0c/s1600/2008-05-28_124414.jpg
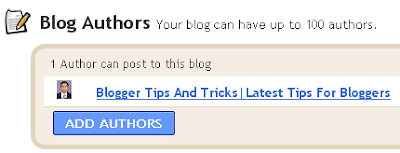
Support By Blogger