
IntenseDebate is one of the most popular a feature-rich comment system for WordPress, Blogger, Tumblr and many other blogging/CMS platforms.In this tutorial I am going to explain how to add IntenseDebate comment system to Blogger blog.
With IntenseDebate,you can do many things than your default comment system.These are some main features of IntenseDebate comments.
IntenseDebate features:

HTML Formatting
You can also customize your links and add some photos to your comments. IntenseDebate supports the following HTML tags: <a>, <b>, <i>, <u>, <em>, <p>, <blockquote>, <br>, <strong>, <strike>, <img>
Gravatar
Intensedebate offers full Gravatar support. If you have a Gravatar they will automatically upload your Gravatar when you signup for IntenseDebate. You can choose to use your Gravatar or upload a different profile pic.
Before start this process,you must backup your blogger template first.Save the backup template file on your hard drive.
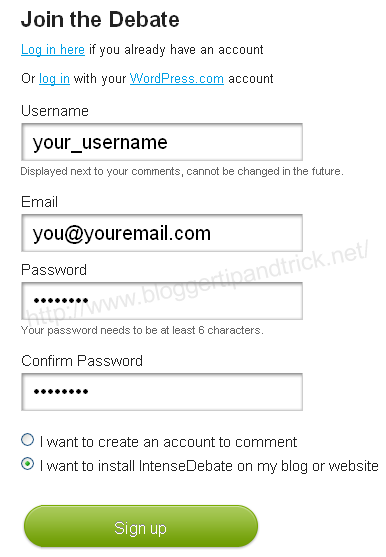
1.Create a Account on IntenseDebate.com.
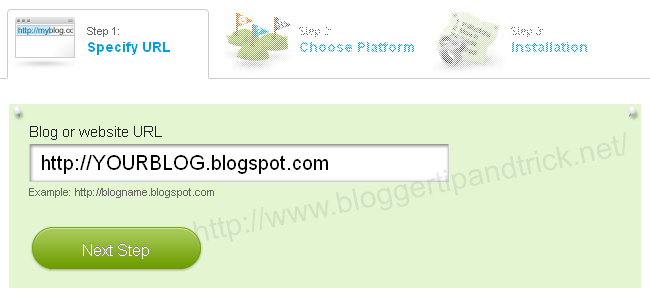
2.Now add your blog to IntenseDebate : http://intensedebate.com/install
3.Then you can see this window. Now you have to select some option.
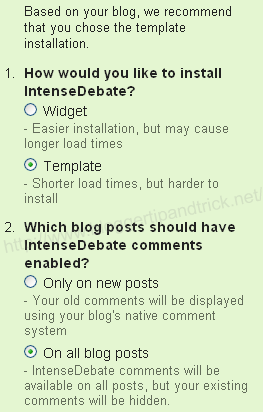
1.How would you like to install IntenseDebate?
select "Template" option.
2.Which blog posts should have IntenseDebate comments enabled?
Only on new posts
- Your old comments will be displayed using your blog's native comment system
On all blog posts
- IntenseDebate comments will be available on all posts, but your existing comments will be hidden.
Select "On all blog posts" option.
Note : If you want to keep "Blogger default comments of your old blog posts",then select "Only on new posts".
4.Scroll down to the bottom of the instructions.
Now upload the template you have backup.
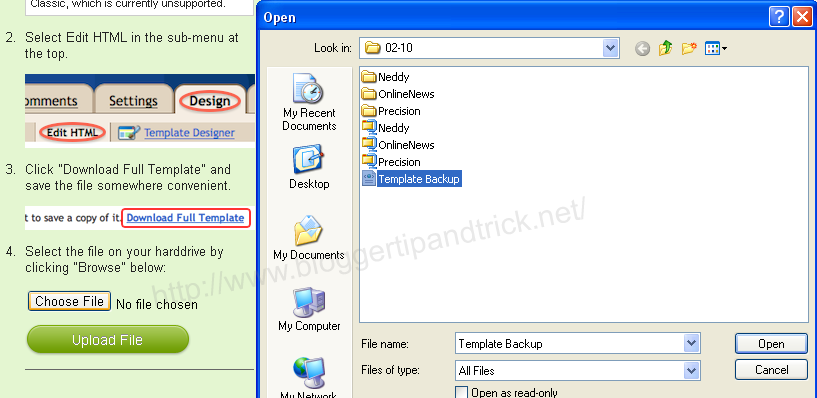
5.After uploading it you can see a screen like below. Copy modified template code from the textfield.
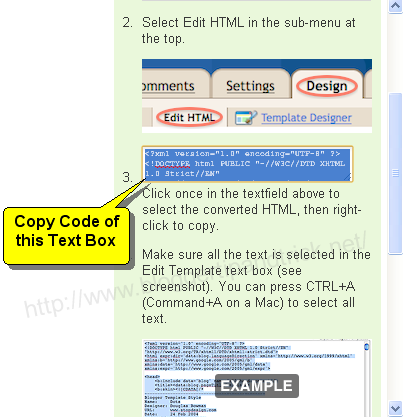
6.Login to your blogger dashboard--> Design--> Edit html.
7.Select entire code in the Edit Template text Box and delete it.Now you must have a blank text box.
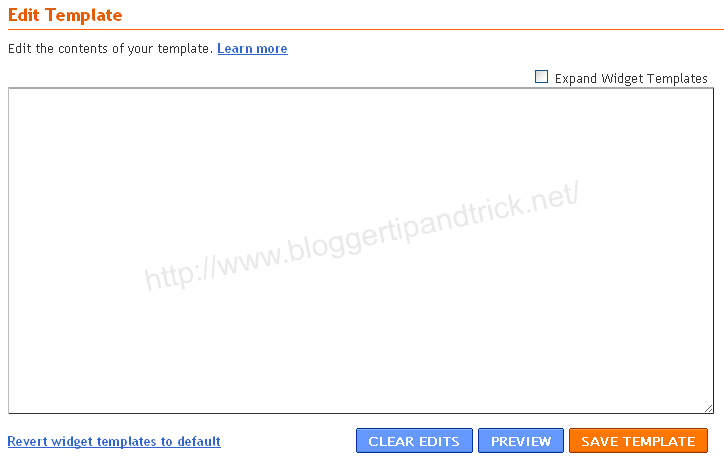
8.Now paste the code we have copied in step 5.
Save your template.You are done.
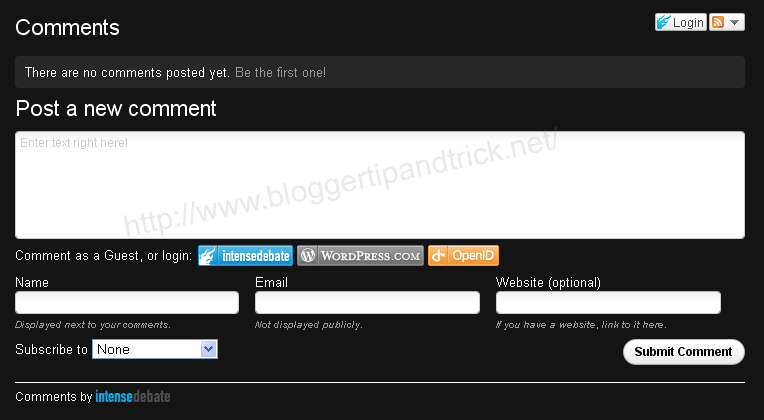
You can see IntenseDebate comment form under your blog posts.
READ MORE - How To Add IntenseDebate Comment System to Blogger
With IntenseDebate,you can do many things than your default comment system.These are some main features of IntenseDebate comments.
IntenseDebate features:
- Comment Threading.
- Reply-By-Email.
- Email Notifications.
- Commenter Profiles.
- Moderation/Blacklisting.
- Reputation Points & Comment Voting.
- Plugins API.
- OpenID.
- Widgets.
- Twitter Connect.
- Facebook Connect.
- RSS Readers & Tracking.

HTML Formatting
You can also customize your links and add some photos to your comments. IntenseDebate supports the following HTML tags: <a>, <b>, <i>, <u>, <em>, <p>, <blockquote>, <br>, <strong>, <strike>, <img>
Gravatar
Intensedebate offers full Gravatar support. If you have a Gravatar they will automatically upload your Gravatar when you signup for IntenseDebate. You can choose to use your Gravatar or upload a different profile pic.
Before start this process,you must backup your blogger template first.Save the backup template file on your hard drive.
1.Create a Account on IntenseDebate.com.

2.Now add your blog to IntenseDebate : http://intensedebate.com/install

3.Then you can see this window. Now you have to select some option.

1.How would you like to install IntenseDebate?
select "Template" option.
2.Which blog posts should have IntenseDebate comments enabled?
Only on new posts
- Your old comments will be displayed using your blog's native comment system
On all blog posts
- IntenseDebate comments will be available on all posts, but your existing comments will be hidden.
Select "On all blog posts" option.
Note : If you want to keep "Blogger default comments of your old blog posts",then select "Only on new posts".
4.Scroll down to the bottom of the instructions.
Now upload the template you have backup.

5.After uploading it you can see a screen like below. Copy modified template code from the textfield.

6.Login to your blogger dashboard--> Design--> Edit html.
7.Select entire code in the Edit Template text Box and delete it.Now you must have a blank text box.

8.Now paste the code we have copied in step 5.
Save your template.You are done.

You can see IntenseDebate comment form under your blog posts.


