
Just a quick update.. Google updated the PageRank's few hour's ago. If you didn't checked your blog's pagerank yet.. check it now :)
READ MORE - Google Updated PageRank's today
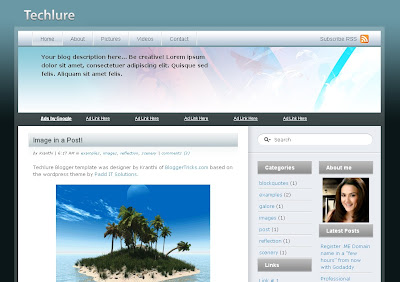
Stylish 3 Column Blogger Template "Techlure" Free Download
Here I am.. again back with.. a great 3 Column Blogger Template for you guys!
The template is very stylish,professional looking with a nice header logo at the top and you can put adsense 728 X 15 adsense link unit at the top which will maximise your CTR and your earnings.
This was originally a wordpress theme designed by Padd IT Solutions... and I converted that wp theme into Blogger format.
Installation Instructions:
First follow the basic installation steps here.
Once you completed installing the template successfully, you have to do a few things..
1.The *psd file of the logo is supplied with the download files. Open it with photoshop, select the text layer and use the 'Text' tool to edit the 'techlure' name with your's (your blog name)

After editing the logo, save the file in *jpeg format and upload the image to any image hosting service like photobucket and copy the direct link to that image..
and replace this below url in the template code with the one you just copied and save the changes.
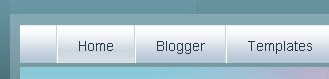
2.Edit the top navigation links by simple finding the below code ( Ctrl+ F to search)
3. Edit the Rss Feedburner url by finding this code

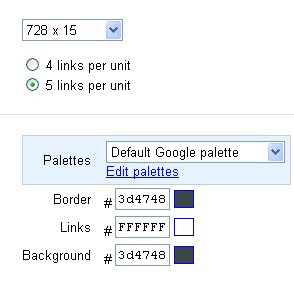
4.And the final thing is adding an adsense link unit (728 X 15px)
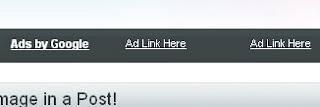
Use the colors as shown in the below screenshot sothat the ad will be perfectly blended to the background
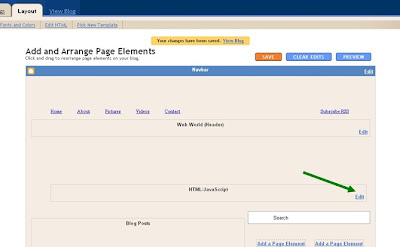
After copying the adsense code, Sign in to Blogger � layout
and click on the 'edit' as shown below and paste your adsense code and SAVE THE CHANGES.
That's it guys! Hope you all like the template...
If you like the template or have any questions to ask..?? leave a comment!
READ MORE - Stylish 3 Column Blogger Template "Techlure" Free Download
The template is very stylish,professional looking with a nice header logo at the top and you can put adsense 728 X 15 adsense link unit at the top which will maximise your CTR and your earnings.
This was originally a wordpress theme designed by Padd IT Solutions... and I converted that wp theme into Blogger format.

Installation Instructions:
First follow the basic installation steps here.
Once you completed installing the template successfully, you have to do a few things..
1.The *psd file of the logo is supplied with the download files. Open it with photoshop, select the text layer and use the 'Text' tool to edit the 'techlure' name with your's (your blog name)

After editing the logo, save the file in *jpeg format and upload the image to any image hosting service like photobucket and copy the direct link to that image..
and replace this below url in the template code with the one you just copied and save the changes.
http://i522.photobucket.com/albums/w346/charcoal2-template/techlure/background-title.jpg
2.Edit the top navigation links by simple finding the below code ( Ctrl+ F to search)

<li class='current_page_item'><a href='http://bloggertricks.com'>Home</a></li>

<li class='nl'><a href='http://blogger.com'>Blogger</a></li>

<li class='nl'><a href='http://bloggertricks.com'>Templates</a></li>

<li class='nl'><a href='http://google.com'>Google</a></li>

<li class='nl'><a href='http://gmail.com'>Gmail</a></li>
3. Edit the Rss Feedburner url by finding this code

<li class='rss'><a href='YOUR-FEEDBURNER-URL-HERE'>Subscribe RSS</a></li>4.And the final thing is adding an adsense link unit (728 X 15px)

Use the colors as shown in the below screenshot sothat the ad will be perfectly blended to the background

After copying the adsense code, Sign in to Blogger � layout
and click on the 'edit' as shown below and paste your adsense code and SAVE THE CHANGES.

That's it guys! Hope you all like the template...
If you like the template or have any questions to ask..?? leave a comment!
Register .ME Domain name in a "few hours" from now with Godaddy

Good news for all! In a few hours from now, you can register ".ME" TLD (Top Level Domain) with godaddy.
If you are trying to build a new blog or a website, I recommend you to register a .ME web domain name rather than ".Com,.Net,.Info,etc".. because the .ME domain looks and sounds better than the .com,etc and also you have a great chance to get your preferred domain name.
Godaddy.com stated that the Domains are issued on a first-come first-served basis.
So, grab them as soon as you can.
The registrations will open on Thursday,July 17,2008 at 8 AM PDT which is less than 3 hours from now. The Registration fees for the .me domains costs around $20/year (Two year minimum registration required).
There are no restrictions for the content you can place on your registered .me web pages. So, you can use this .me domain extension for adult sites aswell ;)
Imp notes:
Minimum domain name length should be 3 characters
Maximum domain name length can be up to 63 characters
Few Thousands of Premium domain names are already reserved and will be auctioned later this month.
Register your own .Me domain name here.
Professional Magazine style Blogger Template 'FunkyZine'
Download Excellent,Professional Magazine style Blogger Template 'FunkyZine':

FunkyZine is a magazine style with stylish background,3 column, widget ready Blogger Template.
This was originally a Wordpress theme designed by ChiQ of wpthemedesigner.com
and I converted it into Blogger xml format for you guys!
and change this above url in the template code with the one you just copied.
2.Edit the top navigation links.
 Find this code and change the anchor text (Home,About,Pictures,etc) and write the respective links by replacing the YOUR-LINK-HERE
3.And the final thing to do is to edit the feedburner url's.

Find this code and enter the respective links.
and Save the Changes.
Hope you guys like the template!
READ MORE - Professional Magazine style Blogger Template 'FunkyZine'

FunkyZine is a magazine style with stylish background,3 column, widget ready Blogger Template.
This was originally a Wordpress theme designed by ChiQ of wpthemedesigner.com
and I converted it into Blogger xml format for you guys!
Template installation help:
If you are a newbie, first install the template using the instructions here.
After installing the template successfully, you have to do a few things..
1. A *psd file of the header logo is packed with the template download file, open it with Photoshop and edit the logo text to your Blog name.
![]() Once you completed editing it, save the file as *jpeg format and upload the image to any image hosting service like photobucket and copy the direct link to that image.
Once you completed editing it, save the file as *jpeg format and upload the image to any image hosting service like photobucket and copy the direct link to that image.
Next, go to Template �� Edit html and find this url
and change this above url in the template code with the one you just copied.
2.Edit the top navigation links.
 Find this code and change the anchor text (Home,About,Pictures,etc) and write the respective links by replacing the YOUR-LINK-HERE
3.And the final thing to do is to edit the feedburner url's.

Find this code and enter the respective links.
and Save the Changes.
Hope you guys like the template!
Professional Web Templates at DreamTemplate.com

Today morning, I was in search of a few wordpress themes to convert them into Blogger templates and eventually I found this site. I was very amazed to see the amount of quality web templates they have.Not only that, they offer many variety of graphic products, icons, flash web templates, navigation interfaces,etc and they keep on adding new products from time to time.
That is definitely of the the best web template source I have seen on the net.
They're offering Membership subscriptions starting from $59.95 ..So, if you buy that subscription, you can download unlimited products from that website for that period of time (i.e, you can download everything in this time including all those thousands of eye catching web templates,icons,graphics,etc).
After you purchased the membership, you have to wait some time for your account to be activated.During this time, they'll manually verify your account and transaction details. Normally, they do this very fast, but due to the increase of fraudulent transactions these days, it'll take some more time.
Once you activate your account, you can download unlimited files, and you need winzip or winrar software to extract those downloaded files. Most of these templates use html,css,etc.. so, if you are a newbie in programming, go for any template editing softwares like Dreamweaver, frontpage,etc for editing the templates.. (or) there are a few freeware softwares available, just google search it.
What you'll get?
2,000+ Premium Quality Website & Flash Templates (the good thing is, they'll include the *psd files aswell.So, you can edit them as you like).
15,000+ Cliparts, Abstract Images & Animations.
6,000+ Background Textures (you can use them as backgrounds for your website).
8,000+ Professional True-Type Fonts (still using default fonts for your website? Time to change it )
150+ Microsoft Office PowerPoint Templates.
500+ Microsoft Office Word Templates.
200+ Unique Design/Abstract Logos.
600+ Professional Business Legal Forms/Documents.
You can also earn money with their affiliate program. This is how it works. After signing up with their affiliate programe, you have to put their banners, referrel links, in your blog/website/template shops/etc and they'll pay you 30% commission for every sale/user you refer to DreamTemplate.com/sale. So, start earning money with this incredible program aswell. You have to create a template show to participate and all the details are in their site. And another good thing is you don't need to have their template membership to participate in this.
Payments are made within 45 days of the close of a calendar month for all verified and approved sales in that particular calendar month. For example, if you refer 2 people in september, then you'll get payment on or before November 15. If you want to see how your affiliate links/banners are working, just sign in and you'll get the results instantly. If you want any help, just submit a ticket/email and they'll respond and solve your problem within 24 hrs.
What if you are unsatisfied with them? No problem! They offer 30 day unconditional money back guarantee policy. If you are unhappy, you can cancel the subscription and the money will be refunded to you within 30 days.
Don't waste time! Buy a subscription as soon as you can and use a gorgeous web template on your site. :)
Charcoal Blogger Template with 3 Columns
Previously, I Converted Popular Charcoal 2 column wordpress theme into Blogger xml format.
Just a few days before, the 3 column version of the wordpress theme was released by Jinsona of web2feel.com and so many readers are leaving comments daily asking me to convert that 3 column version into Blogger template.. So, here it is guys.. the much awaited Charcoal Blogger Template with three columns is ready to download.

As usual, after downloading and installing the template,change the top navitation links
 Scroll down the template and find this code:
and replace the text (Home,About,Pictures,etc) and write the link to that page by replacing the YOUR-LINK-HERE
Hope all like the template!
READ MORE - Charcoal Blogger Template with 3 Columns
Just a few days before, the 3 column version of the wordpress theme was released by Jinsona of web2feel.com and so many readers are leaving comments daily asking me to convert that 3 column version into Blogger template.. So, here it is guys.. the much awaited Charcoal Blogger Template with three columns is ready to download.

As usual, after downloading and installing the template,change the top navitation links
 Scroll down the template and find this code:
and replace the text (Home,About,Pictures,etc) and write the link to that page by replacing the YOUR-LINK-HERE
Hope all like the template!
Another 3D Blogger Template "Graffiti Art"
Yeah! Another Stunning Blogger Template for all of the BloggerTricks.com readers..
Over the past few days I saw so many of you guys blogging about this site and some are leaving very encouraging comments... that recharged me a bit...
so.. here's today's template "Graffiti Art".
If you have any art,design or any personal weblog, this theme well suits for your site..
As you can see,the theme was very good looking with a Gorgeous 3D header image and lovely navigation links at the top and a nice sidebar.
This template was originally a Wordpress theme by wpgalaxy.com. I converted that into Blogger Xml format and hope you all like it!


Go to 'Edit html' and scroll down the template code and find this piece of html code (hit Control+F to search)
Now, change the text(Home,About,etc) and add the respective links by Replacing the YOUR-LINK-HERE
3.And the final step is adding your Feedburner url
 Find this code:
and Write your Feedburner url in the place of YOUR-FEEDBURNER-URL
and Save the changes!!
Leave a comment if you like the template of if you have any questions..
READ MORE - Another 3D Blogger Template "Graffiti Art"
Over the past few days I saw so many of you guys blogging about this site and some are leaving very encouraging comments... that recharged me a bit...
so.. here's today's template "Graffiti Art".
If you have any art,design or any personal weblog, this theme well suits for your site..
As you can see,the theme was very good looking with a Gorgeous 3D header image and lovely navigation links at the top and a nice sidebar.
This template was originally a Wordpress theme by wpgalaxy.com. I converted that into Blogger Xml format and hope you all like it!

LIVE DEMO DOWNLOAD
Installation Help:
1. First Install the template by following the instructions here.
2.Once you installed the template,you have the edit the top links
Installation Help:
1. First Install the template by following the instructions here.
2.Once you installed the template,you have the edit the top links

Go to 'Edit html' and scroll down the template code and find this piece of html code (hit Control+F to search)
Now, change the text(Home,About,etc) and add the respective links by Replacing the YOUR-LINK-HERE
3.And the final step is adding your Feedburner url
 Find this code:
and Write your Feedburner url in the place of YOUR-FEEDBURNER-URL
and Save the changes!!
Leave a comment if you like the template of if you have any questions..
How to install Blogger Templates downloaded from this site??
Everyday so many readers leaving comments asking "How to install xml blogger templates?".
So, to make it easier for you, here is the complete tutorial on how to install blogger templates downloaded from this site..
1.First download the template and unzip the file using winrar or winzip. After extracting the file you will see a folder named Images(incase if you lost) and an xml file.
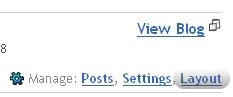
2.Now, sign in to Blogger dashboard and click on the layout.
3.Here is the important step, after uploading any new Blogger template, all of the previous widgets like your google adsense ads,text,profile,poll,etc etc will be lost.
So, to avoid this to happen, in this step click on 'edit' on all the widgets and copy the codes into notepad,etc.
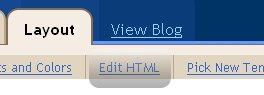
4.Next, click on the 'Edit html' tab
5.You'll see an option to download the current template, so do it!
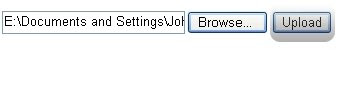
6.Just below that,there's an option of uploading new template.So, use the Browse button and upload the downloaded xml file(which we discussed in step 1).
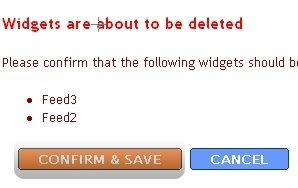
7.Now, a message appear saying that your widgets are about to be deleted.Click on the Confirm & Save (no problem doing this because we already copied the widget codes in Step 3).
Now you successfully installed the template :)
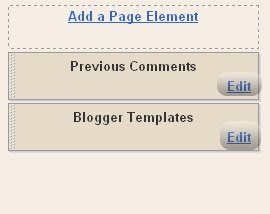
Click on the 'Page elements' page now and add the codes that you copied in step3 using the 'Add a Page Element' option.
Note:The *Images(incase if you lost)* folder contains all the image files used in the template.
Daily thousands of template copies are downloading from this site.. so, in future if my server bandwidth exceeds, you may see images not loading in your sites.So, For this not to happen, Upload all the images to your own server..
Doing this is very simple, Click on the 'Edit html' and go through the template code and replace all the image links(starts with http and ends with .jpg or .gif or .png) with the direct image links you got after uploading the images to any Free image hosting service like photobucket,etc. and SAVE THE CHANGES.
READ MORE - How to install Blogger Templates downloaded from this site??
So, to make it easier for you, here is the complete tutorial on how to install blogger templates downloaded from this site..
1.First download the template and unzip the file using winrar or winzip. After extracting the file you will see a folder named Images(incase if you lost) and an xml file.
2.Now, sign in to Blogger dashboard and click on the layout.

3.Here is the important step, after uploading any new Blogger template, all of the previous widgets like your google adsense ads,text,profile,poll,etc etc will be lost.
So, to avoid this to happen, in this step click on 'edit' on all the widgets and copy the codes into notepad,etc.

4.Next, click on the 'Edit html' tab

5.You'll see an option to download the current template, so do it!

6.Just below that,there's an option of uploading new template.So, use the Browse button and upload the downloaded xml file(which we discussed in step 1).

7.Now, a message appear saying that your widgets are about to be deleted.Click on the Confirm & Save (no problem doing this because we already copied the widget codes in Step 3).

Now you successfully installed the template :)
Click on the 'Page elements' page now and add the codes that you copied in step3 using the 'Add a Page Element' option.
Note:The *Images(incase if you lost)* folder contains all the image files used in the template.
Daily thousands of template copies are downloading from this site.. so, in future if my server bandwidth exceeds, you may see images not loading in your sites.So, For this not to happen, Upload all the images to your own server..
Doing this is very simple, Click on the 'Edit html' and go through the template code and replace all the image links(starts with http and ends with .jpg or .gif or .png) with the direct image links you got after uploading the images to any Free image hosting service like photobucket,etc. and SAVE THE CHANGES.
Subscribe to:
Posts (Atom)


