How To Submit blogger sitemap to yahoo to index your web pages

Submitting your site to yahoo is easy and give your web pages more exposure.
All you need is a YAHOO ACCOUNT(ID).However,you don't need an yahoo ID to know the information like how many pages are indexed,etc.But,if your blog is a new one or no pages in your blog are indexed(type your blog url in yahoo search and see to check whether your web pages are indexed or not), then you want Yahoo id to submit your sites,feeds,etc.
Let't see how to make yahoo index your webpages by submitting your blog sitemap.

1.Go to Yahoo Site Explorer

2.Click on the 'Sign in' link which is at the top of the page (If you don't have a Yahoo id, you can get one here) to sign into your account.

3.Type your blog url in the box provided and click on the 'Add My Site'

4.After adding your site,you need to Authenticate(Verify your ownership).

Now click on the site name which submitted you and then click 'Authenticate' in the next page.

There are two ways to verify your ownership.One is to upload a file to the root directory of your site which can't be possible in blogger.

Another one is to 'adding a metatag' which is possible and the only way to verify ownership for bloggers.First,copy the metatag..

Next,sign in to your blogger account>Edit html and paste the metatag below the head tag and SAVE THE CHANGES.

When you return to Yahoo! Site Explorer, click the button that says �Ready to Authenticate

Next,you will get a message saying that 'Your site is pending authentication'

Note:Don't remove the metatag,they will revalidate your ownership by checking your ownership regularly.

5.Next,go back to the 'Site explorer home', and check the box next to your blog url and click on the Manage button.

6.Type rss.xml or atom.xml in the box provided.It helps yahoo to discover more of your site content via your rss or atom feeds and to index your blog pages quickly whenever your blog is updated.Next,click on the add feed button.

That's it.Now,you have sucessfully submitted your blog sitemap to yahoo.Check your account after a couple of days and you will see your blog indexed in yahoo search engine.

Meanwhile,if you didn't submitted your blog sitemap to google,please read this about How to Submit your blog sitemap to Google

READ MORE - How To Submit blogger sitemap to yahoo to index your web pages

How To Add "Email Me" html/javascript code for your blogs,web pages

Adding the "Email me" link to your blog/webpage is very helpful for the visitors who want to contact you.It increases the interactivity between the visitors and your site and make them come regularly.

There are plenty of problems if you show your email address directly on your site as SPAMMERS find your email address easily via search engines,and other sources.
So,by adding this type of links will hide your email address and If your visitors want to contact you,they will click on it.If the visior want to sent to you via another source like yahoo,google,etc they will simply copy the email address(in the outlook express) and email you.
On clicking the links,WINDOWS OUTLOOK EXPRESS will be open by default.
So,how to add the "Email me" link?

There are two types of ways to do it.One is text link and another one is image link.

Text Link:

Suppose,your email id is 123@gmail.com ,here is the code you have to add

<a href="mailto:123@gmail.com">Email me </a>

Don't forget to change the email address in the above code to your's.If you want another anchor text(not "Email me"),you can change it.


Image link:

Suppose,if you want the visitors to email you by clicking on an image,First you have to upload your picture to some image hosting services.They will give a direct link for the uploaded image.Take a note of it.

In this example, the direct link for the uploaded image is http://i626.photobucket.com/albums/tt346/wam8387/bloggertipemail1.png and your email address is some 123@gmail.com ,the code you have to add is

<a href="mailto:123@gmail.com"><img src="http://i626.photobucket.com/albums/tt346/wam8387/bloggertipemail1.png" alt="Email me" width="120" height="57" border="0" /></a>

Where to paste this code in your blogger(blogspot) blog?

Sign into your blogger dashboard>layout>add a page element>html/javascript and Paste the code and save the changes.
READ MORE - How To Add "Email Me" html/javascript code for your blogs,web pages

How To Embed YOUTUBE video,movie in your blog

So,you want to embed a video(movie) onto your blog.The process is very simple,even a dummie can do it.If you want to embed your original video,then first sign up for an account in youtube and upload your video and get the embed code.

Otherwise,you can easily embed any public youtube video in your blog.Go to youtube.com and search for the video.For example,if you want to embed a Barack Obhama video,search it and copy the embed code on to a windows notepad or anything else.
The following process is explained below with pictures for easy understanding.

1.Go to youtube.com and search for your required video


2.Copy the embeded code(ctrl+c) and paste(ctrl+v) it in windows notepad.


3.Sign in in to your blogger acoount and click the New Post button and next,select the option 'Edit html' as shown below and paste the html code as shown below.


4.Publish the post.That's it, as you can see now,the youtube video is embeded in your post properly.

NOTE:You can change the width and height of the video by replacing the values to your desirable ones.
READ MORE - How To Embed YOUTUBE video,movie in your blog

How To Move Newer, Home and Older Posts Links to top of Post.

The Newer, Home and Older Posts links are available at the bottom of each post on the post pages. These navigation links are only available in the Layout Template. If you have a Classic template you have to upgrade by going to Template---->Customize Design--->Upgrade to get them.

At the bottom of the post these links are situated along with the Label links and the Subscribe to Posts Atom feed link making a lot of clutter. You can reduce the clutter by switching them to the top of the post above the post title. This style is seen in many Wordpress blogs.

To switch then to the top login at Blogger.com and click on Layout link on Dashboard. Then click on Edit Html subtab of Template tab. Put a check in Expand widgets template checkbox at the top of the template code box. Scroll down to this line of code in the blog posts footer widget :

<!-- navigation -->
<b:include name='nextprev'/>

If you want to have them only at the top you can do and Edit---->Cut to remove these lines to the Windows Clipboard. If you want them both at the top and the bottom then do an Edit----->Copy. Scroll up to find this code :

<b:includable id='main' var='top'>
<!-- posts -->
<div class='blog-posts'>

Paste the navigation code below the last line of the above code. Save Template. Clear Cache and view Blog.

You can see them at the top above the post title on the post pages of this blog. If you want to customize them further you can change this code in the CSS part of your template :

#blog-pager-newer-link {
float: left;
}

#blog-pager-older-link {
float: right;
}

#blog-pager {
text-align: center;
margin-top:20px;
}

Use Preview to check the effect before saving changes.
READ MORE - How To Move Newer, Home and Older Posts Links to top of Post.

Useful Widgets,Add-Ons & Tools for Your Blog,Website

Adding Widgets, Add-Ons & tools to your blog You can improve performance of your website.

Here's a collection of best and most useful blog widgets or add-ons that can be easily integrated with any website/blog. All these below add-ons are 100% Free.

Outbrain Star Ratings Widget:


ShareThis or AddThis :


Bookmark and Share


whos.amung.us :


Web2PDF Online :


ZOHO Creator:


Google Talk Badge:


Yahoo Media Player:


Cbox:


Google Translate:

READ MORE - Useful Widgets,Add-Ons & Tools for Your Blog,Website

Citysleeps Blogger Template

Template name : citysleeps

Type : New Blogger Template (XML),3 Column


How To Add this template to your blog.

1.After download the Zip File, you must extract it with software extractor such as Winzip software or other software.

2.Now Log in to your dashboard--> layout- -> Edit HTML

3. Click on "choose" and upload your xml file.That's it.


Note : Before Upload your new template,Don't forget to backup your old template and your widgets.

Download Here !!! Download Template

READ MORE - Citysleeps Blogger Template

Fashionholic Blogger Template

Template name : Fashionholic

Type : New Blogger Template (XML),3 Column


How To Add this template to your blog.

1.After download the Zip File, you must extract it with software extractor such as Winzip software or other software.

2.Now Log in to your dashboard--> layout- -> Edit HTML

3. Click on "choose" and upload your xml file.That's it.


Note : Before Upload your new template,Don't forget to backup your old template and your widgets.

Download Here !!! Download Template

READ MORE - Fashionholic Blogger Template

Exotic-vacation-v100 Blogger Template

Template name : Exotic-vacation-v100

Type : New Blogger Template (XML),2 Column


How To Add this template to your blog.

1.After download the Zip File, you must extract it with software extractor such as Winzip software or other software.

2.Now Log in to your dashboard--> layout- -> Edit HTML

3. Click on "choose" and upload your xml file.That's it.


Note : Before Upload your new template,Don't forget to backup your old template and your widgets.

Download Here !!! Download Template

READ MORE - Exotic-vacation-v100 Blogger Template

DeskMess-v100 Blogger Template

Template name : DeskMess-v100

Type : New Blogger Template (XML),2 Column


How To Add this template to your blog.

1.After download the Zip File, you must extract it with software extractor such as Winzip software or other software.

2.Now Log in to your dashboard--> layout- -> Edit HTML

3. Click on "choose" and upload your xml file.That's it.


Note : Before Upload your new template,Don't forget to backup your old template and your widgets.

Download Here !!! Download Template

READ MORE - DeskMess-v100 Blogger Template

DBluez Blogger Template

Template name : DBluez

Type : New Blogger Template (XML),3 Column


How To Add this template to your blog.

1.After download the Zip File, you must extract it with software extractor such as Winzip software or other software.

2.Now Log in to your dashboard--> layout- -> Edit HTML

3. Click on "choose" and upload your xml file.That's it.


Note : Before Upload your new template,Don't forget to backup your old template and your widgets.

Download Here !!! Download Template

READ MORE - DBluez Blogger Template

How To Add Page Elements to Posts Column and Blog Header

For example your Blog Header Page Element widget code looks like this :

<b:widget id='Header1' locked='true' title='MY BLOG (Header)' type='Header'/>

You can see this by login at Blogger.com and click on Layout link on Dashboard. Then click Edit Html subtab of Template tab. Scroll down in Template code box to see above code. This code is wrapped in the Header section code like this :

<b:section class='header' id='header' maxwidgets='1' showaddelement='no'>
<b:widget id='Header1' locked='true' title='MY BLOG (Header)' type='Header'/>
</b:section>

As you can see in the first line the number of maximum widgets in the header section is set to one. This makes it impossible for you to add new widgets in the header. Also Showaddelement is set to No.

To add more page elements in header change this code to :

<b:section class='header' id='header' maxwidgets='3' showaddelement='yes'>
<b:widget id='Header1' locked='true' title='MY BLOG (Header)' type='Header'/>
</b:section>

Set the maxwidgets to the number of widgets you want to put in the header section plus one. This makes it easier to rearrange the widget order in the header. Also change showaddelement to Yes. This will add a "Add Page Element' link to the header on the Layouts page.

You can do the same with the Blog Posts section code :

<b:section class='main' id='main' showaddelement='no'>
<b:widget id='Blog1' locked='true' title='Blog Posts' type='Blog'/>
</b:section>

Add a maxwidgets=x code and change showaddelement to yes. Save Template and click on Page Elements subtab of Template tab. You can now add any page Elements to the header and Blog posts. Do the same for the footer.


Bookmark and Share
READ MORE - How To Add Page Elements to Posts Column and Blog Header

How To Provide Code for Other Bloggers to Link to your Blog

Your blog will increase in Page Rank when more and more bloggers link to your blog. Hence to gain more backlinks to your blog provide code for others to copy and paste into their blog template.

You can provide code for only a simple link or for an image link. The advantage with a link is you can specify what anchor text you want in the link. The search engines place a lot of importance on anchor text for indexing blogs.

CODE FOR BUTTON LINK

To provide an image link you will first have to create a button image. Just Google for "button generator". Go to any of these sites and create a button image. Here is one I made for this site : After creating the button upload it to a free host like Photobucket.com or Googlepages and copy down the link to the image. Paste it in a Notepad file for inserting it into the code as shown below.

To put the code in your sidebar login at Blogger.com and click on Layout link on Dashboard. Then click on Add Page Element link at top of sidebar. Choose the Html/Javascript option and paste the following code in the contents window and save :

<p>To link to this blog, copy and paste the code below into your site.</p>

<textarea rows="4" cols="24" style="font-size: 1.1em;" readonly="readonly" onclick="this.select();"><a href="BLOG_URL"><img
src="LINK OF IMAGE" alt="BLOG_DESCRIPTION" /></a></textarea>

Replace the CAPS with the relevant data for your blog. For this blog it will look like this :

+++++++++++++++++++++++++++++++++++

To link to this blog, copy and paste the code below into your site.


++++++++++++++++++++++++++++++++++++
This will give an image link to your blog like this after a blogger pastes the above code in his blog.
++++++++++++++++++++++++++++++++++++

CODE FOR A TEXT LINK

The code for a text link is :

<p>To link to this blog, copy and paste the code below into your site.</p>

<textarea id="b_2" rows="4" cols="24" style="font-size: 1.1em;" readonly="readonly" onclick="this.select();"><a href="BLOG_URL">BLOG_TITLE</a></textarea>

Replace the CAPS with your Blog URL and Blog Title. It will look like this :

+++++++++++++++++++++++++++++++++

To link to this blog, copy and paste the code below into your site.


Bookmark and Share
READ MORE - How To Provide Code for Other Bloggers to Link to your Blog

Dark-Mistry Blogger Template

Template name : Dark-Mistry

Type : New Blogger Template (XML),2 Column


How To Add this template to your blog.

1.After download the Zip File, you must extract it with software extractor such as Winzip software or other software.

2.Now Log in to your dashboard--> layout- -> Edit HTML

3. Click on "choose" and upload your xml file.That's it.


Note : Before Upload your new template,Don't forget to backup your old template and your widgets.

Download Here !!! Download Template

READ MORE - Dark-Mistry Blogger Template

Dark-Marble Blogger Template

Template name : Dark-Marble

Type : New Blogger Template (XML),2 Column


How To Add this template to your blog.

1.After download the Zip File, you must extract it with software extractor such as Winzip software or other software.

2.Now Log in to your dashboard--> layout- -> Edit HTML

3. Click on "choose" and upload your xml file.That's it.


Note : Before Upload your new template,Don't forget to backup your old template and your widgets.

Download Here !!! Download Template

READ MORE - Dark-Marble Blogger Template

DallyStudio Blogger Template

Template name : DallyStudio

Type : New Blogger Template (XML),2 Column


How To Add this template to your blog.

1.After download the Zip File, you must extract it with software extractor such as Winzip software or other software.

2.Now Log in to your dashboard--> layout- -> Edit HTML

3. Click on "choose" and upload your xml file.That's it.


Note : Before Upload your new template,Don't forget to backup your old template and your widgets.

Download Here !!! Download Template

READ MORE - DallyStudio Blogger Template

Birdies-Spring-Time Blogger Template

Template name : Birdies-Spring-Time

Type : New Blogger Template (XML),2 Column


How To Add this template to your blog.

1.After download the Zip File, you must extract it with software extractor such as Winzip software or other software.

2.Now Log in to your dashboard--> layout- -> Edit HTML

3. Click on "choose" and upload your xml file.That's it.


Note : Before Upload your new template,Don't forget to backup your old template and your widgets.

Download Here !!! Download Template


READ MORE - Birdies-Spring-Time Blogger Template

How to find the width of your blog Header, Sidebar and Main column

To get the width of the blog Header, sidebars, main column, sign into Dashboard. In the section for the relevant blog, click LAYOUT, then click EDIT TEMPLATE. This will open the template editor window. Search through the templates for the following:

#header-wrapper {
width:750px;
margin:0 auto 10px;
border:1px solid $bordercolor;
}

#main-wrapper {
width: 400px;
margin-left: 20px;
float: left;
word-wrap: break-word; /* fix for long text breaking sidebar float in IE */
}

#sidebar-wrapper {
width: 150px;
float: right;
word-wrap: break-word; /* fix for long text breaking sidebar float in IE */
}

These codes are from the template of this blog. The first block of codes tells me that the width of the Header is 750 pixels. The second block says the main column width is 400 pixels. The last two block of codes tells me that both the sidebars are of width 150 pixels.
READ MORE - How to find the width of your blog Header, Sidebar and Main column

How To Add a Border to your Posts and Sidebar

This is a fairly simple task. I'm working from the Minima template, so your template terminology may be slightly different. You will be looking for the sidebar area in your CSS style sheet.

Look for this in your template.

.sidebar .widget, .main .widget {
border-bottom:1px dotted $bordercolor;
margin:0 0 1.5em;
padding:0 0 1.5em;
}

.main .Blog {
border-bottom-width: 0;
}


Then you will replace it with this code:

.sidebar .widget, .main .widget {
background:#ffffff;
margin:1.5em 0 1.5em;
padding:8px 8px 8px;
border:1px solid $bordercolor;
border-bottom:1px solid $bordercolor;
border-width:1px 1px 1px;
border-bottom:1px line $bordercolor;
}

.main .Blog {
background:#ffffff;
margin:1.5em 0 1.5em;
padding:8px 8px 8px;
border:1px solid $bordercolor;
border-bottom:1px solid $bordercolor;
border-width:1px 1px 1px;
border-bottom:1px line $bordercolor;
}


That will give you a nice border around your posts and your sidebar widgets!

You can change your border width editing above code.
READ MORE - How To Add a Border to your Posts and Sidebar

How To Submit Blogger Sitemap to MSN and Ask.com

Submitting your Blog's sitemap to these search engines will enable them to index the pages and contents of the site. Needless to say, having all the pages indexed will essentially avail your contents to more internet users and improve your site's page rank.

Blogger Sitemap

If you own an external domain site, you can search the net for sitemap generators which help you create a sitemap file. Upload the file onto the root directory and call it sitemap.xml. The full URL of the sitemap will then be something like this:- �http://domainname.com/sitemap.xml�

However, we cannot upload files onto the root directory of Blogger blogs. Hence, when asked to insert a Blogger blog sitemap, it will have to be either:-

http://YOURBLOGNAME.blogspot.com/rss.xml

OR

http://YOURBLOGNAME.blogspot.com/atom.xml

Replace YOURBLOGNAME with the name of your blog. For Blogger blogs, do not add "www." to YOURBLOGNAME. As an example, our blog's sitemap will be http://bloggertipandtrick.blogspot.com/rss.xml

Submit Blog Sitemap to MSN

Unlike Google and Yahoo!, MSN does not have a set of procedures or an address where you can submit sitemaps to. In the latest post in their Microsoft Live Search Weblog, they had invited webmasters and developers to help build a New Webmaster Portal that would include sitemap creation, submission and ping tools, very much what Google and Yahoo! already had. Once MSN has that user interface, we shall update this article.

The MSN team had suggested that webmasters add this to their robots.txt file to have the MSN spiders crawl the sitemap file:-

User-agent: *
Sitemap: http://domainname.com/sitemap.xml

Again, we do not have root access to the Blogger server and this will not avail to us.

The alternative solution in the meantime is to submit the Blog sitemap to Moreover.com. It seemed that there was a standing arrangement for Moreover to provide the submitted feeds to MSN for crawling and indexing.

Whether or not the arrangement still holds true, there is really no harm in submitting your sitemap to Moreover.

Copy and paste this line into your internet browser, replacing the portion in red with the name of your Blog:-

http://api.moreover.com/ping?u=http://YOURBLOGNAME.blogspot.com/rss.xml

If you have submitted it correctly, you should see this message:-

Thank you for your ping. The moreover database will be updated with the new data from your url - http://YOURBLOGNAME.blogspot.com/rss.xml as soon as possible.

Submit Blog Sitemap to Ask.com

Ask.com, previously known as Ask Jeeves, is the next major internet search engine. The sites that it owns include Excite, Bloglines, MyWay and iWon. It is also a participant of the Sitemaps protocol program.

Submitting the sitemap to Ask is easy too. Copy and paste this line into your internet browser, replacing the portion in red with the name of your Blog:-

http://submissions.ask.com/ping?sitemap=http://YOURBLOGNAME.blogspot.com/rss.xml


Submit Sitemaps to other search engines

Progressively, there should be more search engines that will join this Sitemaps program. More likely than not, they will use the recommended ping submission format:-

http://search-engine-url/ping?sitemap=http://YOURBLOGNAME.blogspot.com/rss.xml

If you are unable to find a submission link in that search engine site, try the above and keep your fingers crossed that it is the correct ping address.
READ MORE - How To Submit Blogger Sitemap to MSN and Ask.com

How To Submit Blogger Sitemap to Google


1.First,go to google webmaster tools and sign in with your gmail account.

2.After you logged in, you will see this asking you to add a site.

Add your blog url(ex:bloggertipandtrick.blogspot.com).Don't add with http or www.

3.Next,it asks you to verify your site.It is just to confirm whether you are the owner or not.

CLICK on the 'verify your site' link.

Next,

4.There are two ways to verify your ownership but, there is only one way for the blogger users to add a metatag.

5.Copy the metatag.

Now,sign into your blogger account>click the layout button>Edit html and paste the metatag just after the head tag and save the changes.

Now click the verify button in the google webmaster tools and there will be a confirmation message saying that you have sucessfully verified.

Now,you have to submit a sitemap for google to crawl your site.Go back to the google webmaster dashboard or (home) and click the 'Add' link which is next to your blog name and in the Sitemaps column.

Choose 'Add general web sitemap' from the dropdown menu and type rss.xml or atom.xml next to your blog address.

or

and click the 'Add General Web Sitemap' button.

6.That's it.Now your sitemap is successfully submitted to google.Check 2 or 3 days after and you will see the detailed statistics of your blog(indexed pages,any errors,etc.)
READ MORE - How To Submit Blogger Sitemap to Google
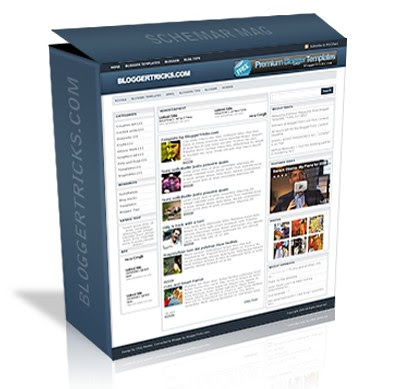
One more Magazine style Blogger Template "SchemerMag"

After very good response on my previous Magazine style Blogger template Turn out Mag, I decided to go for one more Magazine style layout.. so, here it is..

Releasing SchemerMag Magazine style 3 Column Blogger Template:
As usual, this is a wordpress to blogger conversion.. wp theme by Chiq Montes of wpthemedesigner.com and converted to Blogger by me.

look at the screenshot:

SchemerMag blogger template screenshot

Special Features:
� Thumbnails on articles (automatic resize)
� Google Adsense/banner ready
� 3 Columns
� SEO Optimized
� Featured video
� Read more..(automatic summarize)


Step by Step Installation guide:

Step 0: First , follow the basic installation steps here.

Step 1 : Editing top Navigation links
1.a :

editing links 1
Go to LayoutEdit html and find this code


<li><a expr:href='data:blog.homepageUrl'>Home</a></li>

<li><a href='http://bloggertricks.com'>Blogger Templates</a></li>

<li><a href='http://blogger.com'>Blogger</a></li>

<li><a href='http://bloggertricks.com'>Blog Tips</a></li>


and Replace the Anchor text (Blogger Templates,Blogger,Blogtips) and their respective links to your needs.

1.b:

editing nav links 2
and again, there's another navigation bar..
Find this code


<li class='f'><a href='http://google.com'>Google</a></li>

<li><a href='http://bloggertricks.com'>Blogger Templates</a></li>

<li><a href='http://gmail.com'>Gmail</a></li>

<li><a href='http://bloggertricks.com'>Blogging Tips</a></li>

<li><a href='http://blogger.com'>Blogger</a></li>

<li><a href='http://adsense.com'>Adsense</a></li>


and edit the anchor texts,links as you wish.

Step 2: Adding Adsense banners to header and on top of every post

2.a: Adsense on header

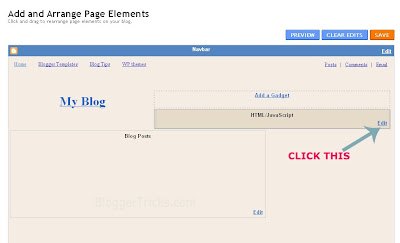
Adsense on headerJust go to Layout and edit the gadget as shown below and paste your adsense code (468 x 60px) and save it..

edit the gadget for adsense banner on header

2.b: Adsense on above first post (even on labels,search pages)

editing ad
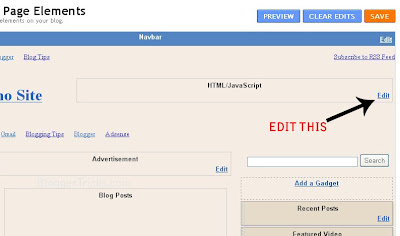
Just go to Layout page and edit the 'advertisement' gadget as shown below

edit this

Step 2 : Edit the logo text

edit the header
The .psd file is included in the template download file. Just open it with photoshop and edit the text and save it as image file (.jpg or .gif). Next , upload to any image hosting servies and copy the image url of the uploaded image.
Next, go to Edit html and replace this image url in the template with the one you just copied now.

http://i43.tinypic.com/er0iyo.jpg

READ MORE - One more Magazine style Blogger Template "SchemerMag"

Cool Trick with Google Images

yea.. Just browsing through the internet this morning and found this cool trick with Google Images and want to share it with you guys!

1. First go to Google Images : images.google.com

2. Search for anything you want like "flowers , cats , dogs,etc"

3. Next, you'll see lot of image thumbnails as usual...

4. Now, here is the trick :
Just copy and paste this code in your address bar and press Enter.
See what happens.. (surprise for you... )


javascript:R= 0; x1=.1; y1=.05; x2=.25; y2=.24; x3=1.6; y3=.24; x4=300; y4=200; x5=300; y5=200; DI= document.images ; DIL=DI.length; function A(){for(i=0; i<DIL; i++){DIS=DI[ i ].style; DIS.position='absolute'; DIS.left=Math. sin(R*x1+ i*x2+x3)* x4+x5; DIS.top=Math. cos(R*y1+ i*y2+y3)* y4+y5}R++ }setInterval('A()',5); void(0)
READ MORE - Cool Trick with Google Images

How To Add Different Meta Tags to Different Blogger Posts

What's the use of adding different meta descriptions to different Blogger Posts?

It is very good for SEO (Search Engine Optimisation) . Actually, why we are adding meta tags is to tell search engines what that page is all about... but, using same meta tags to all of your blog posts lessens the search engine rankings and traffic little bit.
But, if you add different unique meta tags to different Blog posts, it makes the search engines to know more about your individual blog posts and make them crawl and index your pages better and it also improves your Search engine rankings for sure ;)

So, how to add this?

For this to happen, you have to add some pieces of codes to the template.
First Sign in to Blogger dashboard � Layout � Edit html

and find this line

<b:include data='blog' name='all-head-content'/>

and add this code just below that line

<b:if cond='data:blog.url == "http://www.bloggertipandtrick.net/"'>

<meta content='DESCRIPTION' name='description'/>
<meta content='KEYWORDS' name='keywords'/>

</b:if>

Now we have added meta tags to the homepage.

Next, you want to add meta description for your blogger post, for example let see how to add meta tags to below post :

http://www.bloggertipandtrick.net/2009/03/how-to-add-paypal-donate-button-to-your.html

This is the way to add meta tags to above post:

<b:if cond='data:blog.url == "http://www.bloggertipandtrick.net/2009/03/how-to-add-paypal-donate-button-to-your.html"'>

<meta content='How to add Paypal Button to your Blogger Blog, Adding Donations to your blog' name='description'/>

<meta content='Adding,Paypal,Donate,Button' name='keywords'/>

</b:if>

Now, what you have to do is pasting the above code below the home page meta tags and changing the link,description and keywords.
So, the final code now looks something like:

<b:if cond='data:blog.url == "http://www.bloggertipandtrick.net/"'>

<meta content='DESCRIPTION' name='description'/>
<meta content='KEYWORDS' name='keywords'/>

</b:if>

<b:if cond='data:blog.url == "http://www.bloggertipandtrick.net/2009/03/how-to-add-paypal-donate-button-to-your.html"'>

<meta content='How to add Paypal Button to your Blogger Blog, Adding Donations to your blog' name='description'/>

<meta content='Adding,Paypal,Donate,Button' name='keywords'/>

</b:if>

Just like the above procedure, you can add different meta tags to as many blog posts as you can.
READ MORE - How To Add Different Meta Tags to Different Blogger Posts

How To Disable Right Click in Blogger(blogspot) or Webpage

This post explains how to disable right click on blogger(blogspot) or any other webpage using a html(javascript) code.
It is so annoying if someone copies(thefts) your blog posts,articles,images and another kind of information owned by you saying that they are the original owners of the content.
But,I think 'disabling right click' is not the right solution for that.
Most people come to your site to read information and very small percentage of people come to your site to steal your work,images,etc.So,most people feel it insulting and I think it's very unprofessional thing to do

If you want to protect your images,my suggestion is to add a Watermark(logo) of your sitename,or your name on the images,pictures,etc.

Note:Using this javascript code,you only disable the right click by warning the visitors that the content is copyrighted.

This is the code for this.

<SCRIPT language=JavaScript>
<!-- http://www.spacegun.co.uk -->
var message = "function disabled";
function rtclickcheck(keyp){ if (navigator.appName == "Netscape" && keyp.which == 3){ alert(message); return false; }
if (navigator.appVersion.indexOf("MSIE") != -1 && event.button == 2) { alert(message); return false; } }
document.onmousedown = rtclickcheck;
</SCRIPT>


Where to paste it in blogger ?

Sign in to your blogger dashboard-->layout-->Page Elements-->Add a Gadget-->html/javascript and paste the above javascript code and Save the changes.

How it works?

If you right click on the webpage,a message will pop up on screen saying "function disabled".If you want to change the message to you own one like "sorry....the work is copyrighted" or something like that,replace the "funtion disabled" text with your own message in the Javascript code.
READ MORE - How To Disable Right Click in Blogger(blogspot) or Webpage

How To Add Pop-Up Warning to Blog

This can be done using Javascript code. Hence if the viewer has disabled Javascript on his blog this may not work. Also many viewers have pop-up blockers in place which may also prevent the display of this mesage.

To add it in your blog follow these steps :

1. Login at Blogger.com.

2. On the Blogger Dashboard which opens for a successful login click the 'Layout' link.

3. The Page Elements subtab of Template tab will open.

4. Click the Edit Html subtab of Template tab.

5. On the Edit Html subtab scroll down in the Template Code box.

6. Copy the code below :

<script language='JavaScript'>
//
alert ("This is a Demo Pop Up Window where you can put any Messages to viewers!")
</script>


7. Paste the code above just before </head> and in your template. Replace "This is a Demo Pop Up Window where you can put any Messages to viewers!" with your own message.

8. Save the template.

9. Clear Cache and View Blog.
READ MORE - How To Add Pop-Up Warning to Blog

How To Put Google Search Box in Blogger
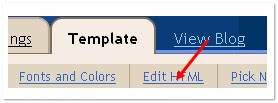
Adding this search box you can let your visitors to search things only in your site or entire web.To put a single search box in your blog copy and paste the code below into a Html Page element in the sidebar :

<form action="http://www.google.com/search" method="get"><div style="border: 0px solid black; padding: 4px; width: 20em;"><table border="0" cellpadding="0">
<tbody><tr><td>
<input maxlength="255" value="" name="q" size="25" type="text">
<input value="Google Search" type="submit"></td></tr>
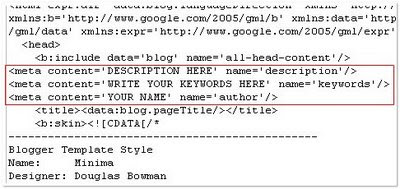
<tr><td align="left">
<input checked="checked" value="YOURBLOG.blogspot.com" name="sitesearch" type="checkbox"> only search this blog</td></tr></tbody></table></div></form>


Replace YOURBLOG with your blog name.

It will look like this :


only search this blog
READ MORE - How To Put Google Search Box in Blogger

How to Add Adsense ads inside Blogger blog posts or between blog posts

How to place adsense ads inside Blogger blog Posts:

1.Sign in to your blogger dashboard>layout>Edit html

Check the box next to 'Expand Widget Templates'

2.Scroll down the window till you see this code

<b:if cond='data:post.includeAd'> <data:adEnd/> <data:adCode/> <data:adStart/> </b:if>

3.Replace that code in the template with the below code

<b:if cond='data:blog.pageType != "item"'> <b:if cond='data:post.includeAd'> <data:adEnd/> <data:adCode/> <data:adStart/> </b:if> </b:if>

4.Again,scroll down the template and find out data-post body tag and paste the below code just above that code{this will show ads above the post body.If you want ads to show below the post,paste the code below that tag.

Here is the code to paste:-

<b:if cond='data:blog.pageType == "item"'> <b:if cond='data:post.includeAd'> <data:adEnd/> <data:adCode/> <data:adStart/> </b:if> </b:if>

That's it!


How to place adsense ads between Blog posts:

1.Sign in to your blogger dashboard>click on the layout link

2.Click on the Edit link in the "Blog Posts' column
..............a pop up window opens..........

3.Check the box next to 'Show ads between Posts'

next,configure the ads,choose the format,colours,etc and SAVE THE CHANGES.
That's it! Now your adsense ads will show between blog posts.

READ MORE - How to Add Adsense ads inside Blogger blog posts or between blog posts

How To Get Know When Google Bot Last Visit


You can know when the google bot last visit to your website/blogsite adding this gadget to your site.


If you want to add this gadjet Get it here
READ MORE - How To Get Know When Google Bot Last Visit

How to Add PAYPAL DONATE Button to Blogger

Adding a Paypal donation button to your blog will give your loyal readers a chance to support(encourage) you by donating a few bucks.
If you don't have a paypal account yet,.. you can get a Free Paypal account here.

1.First,Log in to your Paypal account.


2.Click on the 'Merchant Services' tab


3.Scroll down the window and you will see an option "Donations" in the right sidebar.Click on it!

4.Now,you will see some options like Donation name/service ,donation id,etc etc...
The first field (Donation name/service) is the only thing that is required and all the remaining fields are optional.
Enter that first field,choose a button style,scroll down the window and click on "Create a button Now"

5.Now,you will see some html code... Copy it and sign in to your blogger dashboard �� Click on the layout �� Add a Page element �� html/javascript �� and paste that html code and SAVE THE CHANGES.
READ MORE - How to Add PAYPAL DONATE Button to Blogger

How to add "Email Subscription Form" to Blogger

If are a new blogger,you may have seen an email subscrtiption form like the below one in other blogs while browsing.

It is delevered by FeedBurner.When people subscribe,they will recieve a email with your blog posts whenever your blog is updated.It is a very easy thing and make your visitors come back again and again to your blog.

So,Let's see how to add a "Email Subscription form" like that in your blog:

1.First,Sign in to your FeedBurner account.If you don't have a FeedBurner account yet,you can register it here

2.Click on the "My Feeds" link at the top of the page and next ,click on your blog name

3.Next,Click on the 'Publicize' tab as shown below.

4.Select the "Email Subscriptions" option

5.Next,Click on 'Activate'

6.There are a few more options under the Email Subscriptions column namely Subscription Management,Communication Preferences,Email Branding and Delivery options.Edit them according to your needs.

Now,Click on the Subscription Managemant option and copy the code they provide

7.Sign in to your blogger dashboard>layout>add a page element>html/javascript and paste the code and SAVE THE CHANGES.That's it!
READ MORE - How to add "Email Subscription Form" to Blogger

How To Add Page Elements to Posts Column and Blog Header

Blogger gives a method to add Page Elements to the sidebars of your blog. You have to login to Blogger.com and click on Layout link on Dashboard and then click on 'Add a Page Element' link at the top of the sidebar.


However, there is no method to add Page Elements to the posts column or the Header and the Footer of the blog. There is a workaround for this. Page Elements are represented in the new Blogger Layout templates by widget codes. For example your Blog Header Page Element widget code looks like this :

<b:widget id='Header1' locked='true' title='MY BLOG (Header)' type='Header'/>


You can see this by login at Blogger.com and click on Layout link on Dashboard. Then click Edit Html subtab of Template tab. Scroll down in Template code box to see above code. This code is wrapped in the Header section code like this :

<b:section class='header' id='header' maxwidgets='1' showaddelement='no'>
<b:widget id='Header1' locked='true' title='MY BLOG (Header)' type='Header'/>
</b:section>


As you can see in the first line the number of maximum widgets in the header section is set to one. This makes it impossible for you to add new widgets in the header. Also Showaddelement is set to No.

To add more page elements in header change this code to :

<b:section class='header' id='header' maxwidgets='3' showaddelement='yes'>
<b:widget id='Header1' locked='true' title='MY BLOG (Header)' type='Header'/>
</b:section>


Set the maxwidgets to the number of widgets you want to put in the header section plus one. This makes it easier to rearrange the widget order in the header. Also change showaddelement to Yes. This will add a "Add Page Element' link to the header on the Layouts page.

You can do the same with the Blog Posts section code :

<b:section class='main' id='main' showaddelement='no'>
<b:widget id='Blog1' locked='true' title='Blog Posts' type='Blog'/>
</b:section>


Change this to as below:

<b:section class='main' id='main' showaddelement='yes'>
<b:widget id='Blog1' locked='true' title='Blog Posts' type='Blog'/>
</b:section>


Add a maxwidgets=x code and change showaddelement to yes. Save Template and click on Page Elements subtab of Template tab. You can now add any page Elements to the header and Blog posts. Do the same for the footer.
READ MORE - How To Add Page Elements to Posts Column and Blog Header

How To Create Scrolling Text Boxes

You may want to create a scrolling text box with code for your viewers to copy. Here is the way to do that. Copy the code below into Edit Html part of your Post Editor :

<textarea style="WIDTH: 332px; HEIGHT: 70px" onfocus="this.select();" name="textarea" cols="14">PUT CONTENT HERE</textarea>


This will look like the following :


If you want set background :

<textarea rows="10" cols="40" style="background:#6699ff;">PUT CONTENT HERE</textarea>


This will look like the following :

READ MORE - How To Create Scrolling Text Boxes

How Add META TAGS to Blogger(blogspot) blogs

Adding meta tags you can get get more traffic from search engines like google,yahoo,msn,etc,especially the meta description is the most important one.

Meta tags are the tags which describes your site and tells the search engines what your site is all about.Adding meta tags is an important factor in SEO.(Search Engine Optimisation).Meta tags allows search engines to index your web pages more accurately. In other words,Meta tags communicate with the search engines and tells more information about your site and make it index correctly and accurately.

We must add two main meta tags to the head section of the template.One is the Meta description which describes your site and another one is Meta Keywords which tells about your site keywords(what your site is all about)

Here is how to add meta tags to your blogger(blogspot) blog:

1.Sign in to your blogger dashboard-->click the 'Layout' button[see the screenshot below]


2.Click on the 'Edit html' tab


3.Find this code:

<b:include data='blog' name='all-head-content'/>


4.Now add below code just after the above code.Look at below:


<meta content='DESCRIPTION HERE' name='description'/>
<meta content='KEYWORDS HERE' name='keywords'/>
<meta content='AUTHOR NAME HERE' name='author'/>

Replace,

DESCRIPTION HERE:Write your blog description
KEYWORDS:Write the keywords of your blog
AUTHOR NAME:Write the author's name(Your name)

Now save your template.
READ MORE - How Add META TAGS to Blogger(blogspot) blogs

How To Remove Blogger Navbar

This quick tutorial will show you how to remove/hidden blogger navbar from your blog.Follow the steps given below.


Login to your blogger dashboard--> layout- -> Edit HTML

Put the following code as the picture below.

#navbar-iframe { height:0px; visibility:hidden; display:none; }


Now save your template and you are done.
READ MORE - How To Remove Blogger Navbar

How To Show HTML TEXT in Blogger Posts

As many visitors ask how to embed html text in a way that it is displayed as it is in the published post and also their visitors can copy the content, so here's a way to do that quite easily:

The main problem that bloggers face is that, typing/pasting the html code in either Edit html or Compose sections during posting a blog entry is that, after publishing they dont find the code, rather the code lines are simply missing from their original place.

The reason for this to occur is that if you try to type the HTML as it is (example
), the web browser will interpret that as an instruction to display what follows in a new line (line break) but not display the HTML.

What you can do is:

change the "<" symbol with &lt; , and also the symbol ">" with &gt; , but as to do all this manually is quite difficult, so you can use this website tool for simply converting the html code into embeddable text:

Now you can copy this embeddable text to your blog post.
READ MORE - How To Show HTML TEXT in Blogger Posts

How To Change Blogger Favicon


What is favicon? While using IE Firefox or Opera you will see an icon on the tab when u visit a page.This is called favicon.By default blogspot blogs have a favicon which looks ugly.See it here at the top of the post.So how to remove it? Goto Blogger Template>Edit Html There find the title tag which looks like


and immediately after that add the code given below.

<link href='URL-OF-YOUR-FAVICON' rel='shortcut icon' type='image/vnd.microsoft.icon'/>


Remember to replace "URL-OF-YOUR-FAVICON" with your icon file's url.

Now save your template and your done.
READ MORE - How To Change Blogger Favicon

How To Add MARQUEE TEXT

Marquee text useful for some occasions in web designing.To add a moving text (also called marquee) use the codes given below :

CODE 1:
<marquee>ADD YOUR TEXT HERE....</marquee>

RESULT:

ADD YOUR TEXT HERE....


CODE 2:
<marquee direction="right">ADD YOUR TEXT HERE....</marquee>


RESULT:

ADD YOUR TEXT HERE....


CODE 3:
<marquee direction="left">ADD YOUR TEXT HERE....</marquee>


RESULT:

ADD YOUR TEXT HERE....


CODE 4:
<marquee direction="right" width="100%" style="background:#EC4F52"><font color="white">ADD YOUR TEXT HERE....</font></marquee>


RESULT:

ADD YOUR TEXT HERE....


CODE 5:
<marquee direction="left" width="100%" style="background:#EC4F52"><font color="white">ADD YOUR TEXT HERE....</font></marquee>


RESULT:

ADD YOUR TEXT HERE....
READ MORE - How To Add MARQUEE TEXT

Add a Free Google Search Box to Blogspot Site


To add a google Search bar to your blogspot site add the below Html code into your website.


<!-- Google Search Box HTML Start -->

<iframe src="http://www.getgooglesearch.com/htmlcodes/search.html"
name="googlesearch" allowtransparency="true" scrolling="no"
frameborder="no" height = "45px" width = "400px"></iframe>
<!-- Google Search Box HTML End -->
READ MORE - Add a Free Google Search Box to Blogspot Site

How To Add Outbrain Star Ratings Widget to Blogger

Are you interest about what readers are thinking about your posts? then, you can add this beautiful looking outbrain 5 stars rating button to your blogger,wordpress,typepad,etc.You can also use this ratings button in any webpage.By adding this,you will automatically get the beautiful five stars rating widget just below every post.


This was very simple,easy to use,free and you don't need to register to grab this widget.By adding this widget,you will get instant feedback by your readers.

Most of the visitors feel a bit lazy to write a comments,so with this widget,they will help them and rate your posts as easy as abc.

You can get this rating widget here.
READ MORE - How To Add Outbrain Star Ratings Widget to Blogger

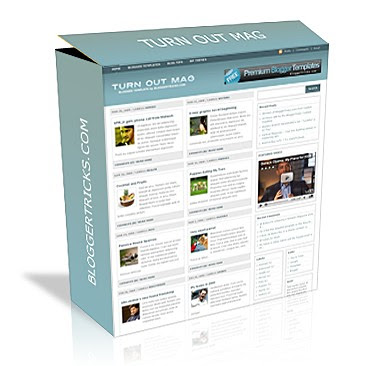
Releasing Premium Magazine Style Blogger Template "TURN OUT MAG"

FREE Premium Magazine Style Blogger Template " TURN OUT MAG "

Over the last few days, so many readers commented on this site asking me to convert a Magazine style wordpress theme to Blogger version... So, for all you guys.. Releasing Premium Magazine style Blogger Template "TURN OUT MAG". This was originally a wordpress theme designed by ChiQ Montes and I converted it to Blogger version.

Screenshot
The template comes with so many built in features including:
� Thumbnails on homepage (automatic)
� Two main columns on the Homepage (Mag style)
� Banner ad / Adsense ready
� 468 x 60 px Banner ad on the header
� Three Columns
� Search Box
� SEO Optimized
� "Read More.." (automatic summarize)
� Featured Video
...and many more...


Step by Step Installation Guide:

(First backup your current template file before installing any new template)

Step 0: First, follow the Basic Template Installation steps here.

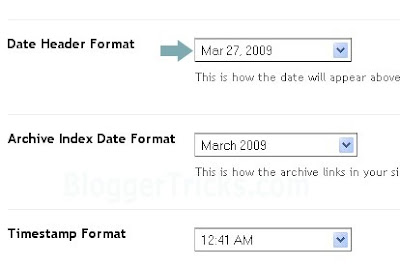
Step 1: Go to SettingsFormatting and select the Date Header format like the one shown below and Save the changes.Choose the DATE HEADER Format
Step 2 : Editing the top Navigation links:

Edit the Nav linksJust go to LayoutEdit html
and Look for this code:


<li><a href='http://bloggertricks.com'>Blogger Templates</a></li>

<li><a href='http://bloggertricks.com'>Blog Tips</a></li>

<li><a href='http://wpthemedesigner.com'>WP themes</a></li>


Just look at the code.. You'll understand. Got it? Just replace the Anchor text (Blogger Templates, Blog Tips, WP themes ) with the corresponding links.

Step 3: You can add 468 x 60 px Adsense ad on Right side of Header:

Adsense ad on header
Just go to Layout and click on "Edit" of the header widget as shown in the pic below:

adsense adand paste you adsense code in the box and Save it.

Step 4: Editing the Logo:

editing logo

The .psd file of the Header logo is included in the download file. Open it with Photoshop and edit the Site Name and description and Save it as image file (.jpg)
Next, upload the image to any image hosting services like Photobucket, Tinypic,etc and after uploading, they will give you a direct link to that image file.

Go to LayoutEdit html and find this image url in the template code..

http://i44.tinypic.com/24exqxd.jpg


and replace it with the one you uploaded and Save the template.
(If you don't know editing the .psd file or If you don't have photoshop, just leave a comment here with your Sitename and description, I'll do it for you..)


Now your Mag style template is successfully installed... Congrats :)

Like the template ? or Have any questions ? Comment here...


---------------------------------------------
Answers to Reader comments:

Question: hi! how about the feed in the upper left corner, how can I edit that? thank you!!! (by weng cariyaga)

Answer: To edit the feed url, just find this

<a expr:href='data:blog.homepageUrl + &quot;feeds/posts/default&quot;'>Posts</a>


and change it to like this


<a href='http://YOUR-FEEDBURNER-URL.com'>Posts</a>


Don't forget to edit the YOUR-FEEDBURNER-URL with your feed address..


Question:
can you please tell me where to add a "share this" or "Addthis" button, and also a Digg button. I want the "share this" button to appear at the end of the post and the "Digg" with submission capability at the top on the main post page. thanks a lot in advance.

To add Sharethis/add this button on the homepage:

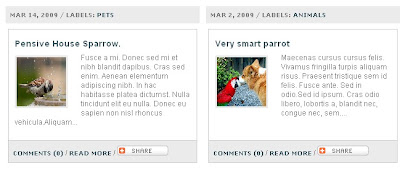
preview after adding addthis widget

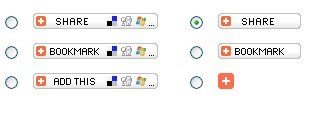
First go to addthis.com and select the button shown below and get the html code for that button.

share this

Next, go to Layout � Edit html and find this code
<a href="data:post.url">Read More</a>
and replace it with this

<a href="data:post.url">Read More</a> / YOUR ADDTHIS CODE

To add on the Post pages:
Find this..

<div id="contentb">


<div class="single">

<h2><data:post.title></data:post.title></h2>

<div class="contentb"><p><data:post.body></data:post.body></p>

</div>

</div>


and add your ADDTHIS code below those lines

The digg option is already there in the sharethis widget..so, if you add digg button again,the homepage looks crappy.

BloggerTricks.com
READ MORE - Releasing Premium Magazine Style Blogger Template "TURN OUT MAG"
 

Support By Blogger